Friday, December 16, 2011

Jiggly Bits

Back in the day (which, thanks to my non-native English speaking friend who once stopped me in mid-conversation to ask why I always talk about "bacon days", is now and forever referred to as such) I worked in the produce department at our local grocery store.  My shifts were spent sweeping up onion skins, promising customers that we honestly weren't hiding more tomatoes in storage and keeping my eye on the apples (and removing the many with toddler sized bite marks).  My best friend (The Other Hannah) worked in the bakery, conveniently located at the far end of the produce aisle (which wasn't very far, because the store was very small).  When she wasn't busy squeezing fillings into danish or spraying imitation kirsch on black forest cakes, she'd wander in to my section to see what was new and good.

Apart from the typical fresh fruits and vegetables, our produce department sometimes stocked specialty items, often some sort of confectionery, and, for a long while, we two Hannahs debated whether sharing the cost of some Aplets & Cotlets (apparently a Pacific Northwest delicacy) would merit each of us chipping in thirty minutes of wage.  The packaging promised tidbits of apples or apricots and pieces of walnuts that were magically suspended in a glistening gel candy then dredged in a powdery sugar coat.  They were totally intriguing - in a not exactly appetizing kind of way.  But still...

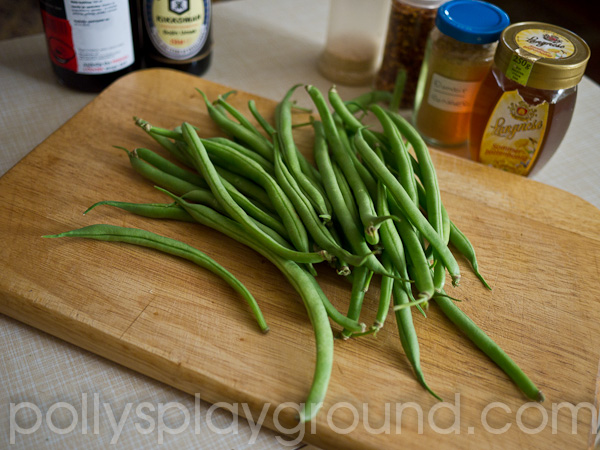
apples, walnuts, powdered sugar

This memory resurfaced last week as I passed by the dining room table, our fruit basket filled with apples aside an overflowing bowl of mixed nuts.  Out of sheer curiosity I returned to my laptop, Googling "Aplets" to see if they were still in existence (they are) and, to my surprise (or perhaps my demise), I also found an online recipe.  Figuring that Aplets might be a possible way to integrate a tiny taste of home into my Christmas treat baskets this year, I read through the ingredients in this posted version and, with great excitement, confirmed that I had everything on hand that I'd need to make them.  Then I got cracking...

And when I say I got cracking, I should eliminate your notion that I ran to the kitchen and whipped up a fantastic batch in the 25 minute prep time as listed.  No, when I say I got cracking, I mean I got cracking; sack of walnuts in one hand, nutcracker in the other, I extracted and chopped until I reached one cup of nuts.

cracked walnut

one cup of hand cracked walnuts

The next morning, while sipping my first cup of coffee, I re-read the recipe, consciously aware of the footnote suggesting that lemon juice, of which I have an endless supply, would be a suitable substitute for rose water, of which I have none.  My half-caffeinated brain argued otherwise. Replace roses with lemons?  While lemons and roses are both deliciously aromatic and both have quite distinct flavours, they are so far from being the same that I just wasn't buying the trade.  And so, before coffee number two, I was Googling "how to make rose water".

fresh cut red rose

I know what you're thinking.  Oh my-lanta!  She made her own rose water!  Yes, and I could let you go on believing that I'm some culinary chemist wizard, but instead I'll tell you the truth.  I learned, through a terrific tutorial at We Like Making Our Own Stuff, a blog with straight forward instructions and a helpful pictorial, that making rose water is a cinch.  Using six basic items (a pot, water, roses, ice, a bowl and a rock - it doesn't get much simpler than that), and with my lovely assistant, "honey" (to keep the lid from getting pushed off the pot), I distilled myself a batch.

pot with inverted lid, ice pack and my lovely assistant, "honey"

Now that I had my rose water, I was ready to go nuts with my Aplets.  I peeled my apples, simmered and pureed them, and continued to follow the recipe as instructed.  When all was said and done, I had a shimmering pan full of apple-walnutty goodness; I couldn't wait for it to set.

I waited...

And I waited...

And I waited some more.

Humidity and gelatin are not good playmates.

pan of apple walnutty goodness

The next day (and more than 24 hours after I'd poured my jelly to set), I decided that whatever will be, will be.  With a sharp, oiled knife I began to slice and carefully lifted the long strips of confection out of the pan.  I chopped each strip in to bite sized squares and started to roll them in sugar.

Here's when things got sticky.

After the first few pieces were rolled, they immediately soaked up the sugar.  Observing my syrupy mess of squares, I opted to leave them to set for yet another day.  Perhaps they'd firm up, or dry out... or something?  I placed them gently on a paper towel lined tray, covered them with a mesh dome and left them alone 'til tomorrow.  

sugar coating:  round one

One week (yep, you heard me) and one roll of paper towel later, my Aplets were ready (in other words, I was sick of seeing that tray).  My patience had prevailed.  They had (sort of) firmed up.  As I finally began to roll them in sugar, I rewarded my own perseverance by plucking a finished-as-it's-ever-going-to-get candy from the cup and popping it in my mouth.

And I was instantly reminded of the ending to the story of us coveting those cotlets 'bacon days' at the store.  We did end up buying them.  We did end up eating them.  I did not end up liking them at all.  And why would I? Jell-O makes me gag.  Molded salads scare me.  I obviously don't. like. gelatinous. foods.  Double U Tee Eff was I thinking? ...

aplets

In all fairness, there are a plethora of people who adore Aplets & Cotlets and my personal distaste should not reflect poorly on the original product as sold.  If jiggly bits are your thing, the recipe I used is probably even adequately delightful;  but, defeated by humidity and (still!) dissolving sugar, I just could not bring myself to gift these away.  Suddenly, like the eight year old me who once begged my mom for a can of TaB, even as she insisted I wouldn't like it, and only because the can was pink, I was stuck with a tray of nutty applish jelly goo squares that, one cup of hand cracked nuts and a small bottle of homemade rose water later, I couldn't let go to waste and would need to choke back on my own.  Ugh.

At least I learned how to make rose water.  I'll be using the rest in our New Year's Eve champagne.

.

'tis the season for sharing!  If you know someone who'd like this (or any other) post, just click on one of my spanky new share icons below to pass it on.  You can also share your thoughts about the post using my new disqus comment system - go on... don't be shy!

Monday, December 12, 2011

Holiday Goodies

My greatest pleasure during the holiday season has always come from creating special edibles to pass around to my nearest and dearest.  Adhering to the adage 'the more, the merrier' (because, what better way to be at Christmas time than merry?), what began, way back when, with a single batch of peanut butter fudge grew, over time, to a gross amount of gastronomic goodies as I continually lengthened my annual list of recipients and added new recipes to divvy up amongst the pretty packages for delivery to their doors.  I took pride in ensuring treats of both sweet and savory, with a wide range of flavours and textures, to guarantee smiles on all of my favourite mouths.  Yes, I definitely prefer to spend my December buried in butter, mixed with flour, sugar dusted and double chocolate dipped.

Homemade Holiday Goodies - Christmas 2006

I have to admit that, here on the island, it is difficult to fall in to the holiday spirit.  Our trees, while beautifully decorated, are not adorned with glass baubles, flashing lights and delicate ornaments, but instead are dripping with brightly coloured bulbs in fresh citrus flavours of mandarin, grapefruit, lemon and orange.  Our redheaded cactus, Spike, is blooming a wreath of pretty pink flowers and our nasturtiums and marigolds, self seeded in last year's pots, are beginning to sprout through the soil.  Given our spring-like environment, and far detached from pre-Christmas pandemonium (though, my mom and my sister may argue the second point as they continue to receive new emails from me listing various shipment tracking numbers and instructions on who should be wrapping what for who), it is easy to let time slide by and virtually forget that 'tis the season. In fact, last year, I did.

Our "Christmas Trees" decorated with mandarins, oranges, grapefruits and lemons

Ok, I didn't actually forget Christmas last year but, the lack of snow certainly numbed my brain and, for the first time in years, I didn't make anything.  It made me sad.  I vowed that this year would be different.

And so I am, once again, making a very merry mess in my kitchen and am up to my elbows in yum.  Undeterred by the reduced number of names on my recipient list (not because they've been naughty, but because I don't actually know that many people on the island at this time of year, we have very little storage space for extra goodies and cross border food shipments are frowned upon) and the fact that I can't always find the necessary ingredients for my regular repertoire, I've emptied my bag of tricks, totally scratched my usual lineup and am going with all things new.  Using readily available foods, this year will be less chocolate, more citrus and completely corn syrup free.  It will also be 100% Christmas, with all the love, the joy and the spirit of the holiday.

Spike (with his holiday attire)

The bad news is, there is less than two weeks until Christmas and, since I tend to be flaky as pie crust when it comes to my posting regimen, the likelihood that I'll share my goodies with you before you're sick of sugar is probably pretty slim.  The good news is, the holidays are always full of surprises.  The better news is, you are likely too swept up in your own seasonal frenzy to notice new posts anyway.  The best news is, I've made it easier than boiling eggs to subscribe to my blog (by email or in your favourite reader) - no missed surprises, no more waiting and wondering and no checking the page for new posts ever again.

Until next time, please promise me you'll play in the snow, drink plenty of eggnog, shop with local small businesses, artists and craftspeople and support your hometown food banks.

Be merry.

'tis the season for sharing!  If you know someone who'd like this (or any other) post, just click on one of my spanky new share icons below to pass it on.  You can also share your thoughts with me using my new disqus comment system (hopefully this will fix the past commenting issues - please let me know if they persist).
.

Saturday, November 26, 2011

Pinch Hit Salsa

Is the clock dangerously close to dinner time and you still have no idea what to make?  Need something to eat before you run out the door to avoid dying of starvation later?  Don't feel like cooking but really want something to eat?  My favourite go-to meal has always been quesadilla.  Throw something on a tortilla, add cheese, fold, fry, serve with lettuce, salsa and sour cream.  Fast.  Easy.  Delicious.

Unless you happen to be on an island in the middle of the Adriatic Sea.  

FastEasy.  Delicious.  *sigh*... well, one out of three ain't bad.  There's never any need for hurry on this island and delicious is enough for me.

quesadilla:  fast. easy. delicious.

As I've told you before, I've managed to conquer homemade tortillas and, while not as fast as opening a package, it really doesn't take me much time to whip up a batch of six.  We always have cheese (though I do miss a good cheddar), our garden is still full of lettuce and sour cream, or kiselo vrhnje (the single most difficult item for me to pronounce in all of the Croatian language), is readily available at all local stores.

But wait.  A quesadilla without salsa?  That's a total quesa-don't-a.

Knowing that salsa is rare to find here and, when it is found, is barely affordable, I had grand plans to make a lasting batch with some of the lovely tomatoes from the garden this summer.  Alas, being the tomato fiends (that's right, fiends) that we are, we ate every single glorious red tomato that our plants produced and set aside none for making anything.  Oh the best laid plans....

But you know me; I absolutely refused to watch my go-to meal get up and leave so, after spending a good ten minutes staring at the cupboard shelves trying to materialize a large jug of Pace Picante out of thin air, I grabbed the lone can of tomatoes that was already physically present and decided to make my own.

flat leaf parsley

This is probably the easiest salsa you will ever make.  It might not be the best you've ever had, but it will take far less time than a trip to the supermarket and will cost much less than grabbing a jar in the chip aisle at the convenience store.  And it does taste fresh, even with canned tomatoes.  Are you ready?

Dump the following ingredients in to your blender, food processor or a receptacle deep and narrow enough to accommodate a hand blender without spraying salsa all over your kitchen (I used the hand blender - and no, before you assume I am suggesting this from experience, I did not make splatters):

  • 1 400g (14.5 oz) can of whole, unpeeled tomatoes, undrained (you'd probably be fine with diced, stewed or chopped tomatoes since they will be salsalated later anyway - but that's what I used)
  • 1 good sized onion, chopped
  • 2 cloves garlic, minced (you could go with more - my tummy won't let me do more raw garlic than that)
  • 1/4 cup fresh flat leaf parsley (I would actually prefer cilantro, but will need to wait until we grow some)
  • 1 minced hot pepper (use your own judgement on this one)
  • 2 tsp lime juice (fresh if you can)
  • 1 tsp vinegar
  • 1 tsp salt (more or less...)
  • 1/2 tsp sugar
  • 1/4 tsp pepper
  • few shakes cayenne pepper
Now whir it all up with your mixer of choice and.... snappity snap... salsa!  If you like it a bit more chunky, dice one of the tomatoes and hold back half of the chopped onions and stir them in after you've blended (if you've got fresh tomatoes on hand you could dice one up and add it as well).

pinch hit salsa

As with any salsa, the flavours are as varied as the people who eat it.  Some like it mild and some like it hot; you'll need to adjust the heat level according to your own personal taste.  The salt factor is negotiable too; if you'll be doing the dip with salty chips you might want to hold back a bit.  If you like it sweeter, add more sugar.  You get my drift.... Use this as a base and make it your own.

salsa in action

Quesadillas are once again fast(ish), easy and, as always, delicious.  You probably have a nice big jug of Pace sitting on the top shelf of your fridge but, if you find yourself without, this is definitely a hit in a pinch.

PS. Next year we'll grow more tomatoes.
.

Sunday, November 20, 2011

Comfy Cabbage Rolls (Unrolled)

I'm a big fan of cabbage rolls.  I'm not a big fan of making cabbage rolls.  Okay, honestly?  I've never actually made cabbage rolls... (no, that wasn't me, that was Saša who made the sarma); just thinking about the process of individually stuffing cabbage leaves completely puts me off.  I prefer to practice a literal approach to comfort food; I seek comfort while the food cooks itself.

But I'm a big fan of cabbage rolls.  I needed to find a way to work this out.  And, without using any boyfriend bribery, I eventually did. Woot!

I'm going to tell you a secret.  You can get all of the flavour (and infinitely more comfort) of traditional cabbage rolls by using the same ingredients sans stuffing and rolling.  Yes, really.  Don't tell your amazing cabbage roll making friends and/or relatives because they'll never make the real deal for you again if they ever find this out.

This dish is embarrassingly simple to prepare (as in you need the cooking skills of a thumbtack) and requires very few ingredients (most of which you probably have on hand).  If you are longing for a lazy afternoon but still want to impress those around your dinner table (with flavour - not with presentation... because honestly it looks like a pile of slop) then grab your aprons and let's go...

You will need an average size head of green cabbage (or 2 small ones... or part of a massive one...), a couple of onions, about a pound of ground meat (I use mixed pork and beef), raw white rice, 2 x 500 g cartons of tomato sauce (that's roughly 3.5 cups for the imperialists - based not on mathematical conversions, but rather by pouring water in to my empty cartons to measure it just for you), honey, lemon juice, soy sauce, salt, pepper and garlic powder.  You will also need a large pot (my 5.5 litre is just large enough to make this) with a lid.

chopped onions

Once you have gathered your ingredients, heat a small amount of fat (butter, lard, oil... whatever makes you comfy) in your large pot over medium-low heat.  Chop up your onions and add them to the pot.  You don't want to fry or brown the onions, you just want to heat them until they are soft and infuse the fat with their flavour - adjust your burner temperature accordingly.  

softening the onions

While your onions are softening, cut your cabbage into large chunky pieces.  Loosely separate the cabbage leaves to break apart any too chunky chunks and give them a nice rinse under your kitchen tap to get rid of any residual yuck.
  
chunky cabbage

Add the cabbage to the pot, a few handfuls at a time, stirring to mix with the onions.  Don't freak out if you can't fit all the cabbage in to the pot right away as it will shrink while it heats and will create room for more.

green cabbage and onions

Once you have added the cabbage to the pot (or in between adding handfuls), combine 4 soup sized spoonfuls of honey with 60 ml (1/4 cup) of lemon juice.  I recommend squeezing two medium sized lemons because fresh is always best - but use what you've got.
  
juicing lemons

Mix the honey/lemon with 500 ml (2 cups) water (I did mine right in the honey jar because I only had about 4 spoonfuls of honey left in there).  Add the tomato sauce (1 kg or 750 ml-ish or 3.5 cups-ish...) and season with salt, pepper and garlic powder.  Your seasoning will depend entirely on your taste (and whether you used salted or seasoned tomato sauce) BUT... don't get too heavy with the shakers as you'll be adding some seasonings to your meat as well... and you can always add more later if needed.  You have been warned.

salt, pepper, tomato sauce, garlic powder and honey (with lemon juice and water)

Pour the sauce over the cabbage in the pot, increase the burner temperature and bring to a boil, stirring occasionally.  When the sauce begins to boil, cover the pot with a lid and simmer while you make the meatballs.  Don't worry if your sauce isn't covering all the cabbage - it will be eventually.  As your cabbage simmers away in the sauce, it's time to make the meatballs. 

tomato sauce poured over cabbage and onions
seasonings, ground meat, uncooked white rice

Combine your ground meat (excuse the brown bits in the photo - I left it to defrost in the microwave a few seconds too long) with 50g (1/4 cup) of UNCOOKED white rice, a splash of soy sauce (or worcestershire if you'd rather...), garlic powder, pepper and salt.  As with the tomato sauce, the seasoning level is left up to you.  Don't over mix or squeeze the meat, just gently toss the ingredients together until everything is combined.  Speaking of meatballs, I should probably mention that,unless you don't mind having a layer of fat floating on top of the pot as you get ready to serve your meal, using lean ground meat will be your best choice.

ground mixed meat with uncooked rice, soy sauce and seasonings

By the time you finish mixing your meat and carry it over to the stove, you will notice that your simmering cabbage is now nicely covered with sauce (see?  I told you it would happen!).  

simmering cabbage (now nicely covered with sauce)

Form the meat mixture in to small meatballs and drop them in to the pot on top of the cabbage.  When all the meatballs have been added to the pot, press them gently with the back of a spoon to cover them with sauce.  Bring the sauce back up to a gentle boil (if it isn't already), cover, reduce the heat and simmer for 2 hours. Two whole hours!!  That's ample time to get comfy.  You may now kick back and relax while your home fills with the cozy scent of comfortable.

meatballs and cabbage simmering in tomato sauce

As your meal makes away on the stovetop, do peek under the lid every so often to ensure that you are still at a simmer and to give it a gentle stir.  My 'stirring' involves sliding a large wooden spoon down the side of the pot and stirring along the bottom so that I don't disturb the meatballs.  Don't panic if (and when) your meatballs crumble... in the end you will have some random meaty bits throughout the sauce, but you will still have some nice big chunky lumps.  After two hours of simmer (or longer - that's okay too), call everyone to the table and enjoy your comfy cabbage not-rolls.  Serve with mashed potatoes and sour cream.

random meaty bits and big chunky lumps

As promised, this dish is the epitome of comfort food and is sure to please the masses.  I assume it will freeze well (we just eat it for three days straight... and it gets better and better each day).  I did already tell you that this meal isn't pretty... but that's comfort food.  You probably don't look your finest when you're donning decade old sweatshirts, flannel pajama bottoms and mismatched wool socks... but the way you feel when you're wearing them best explains my point.

comfy cabbage rolls (unrolled), mashed potatoes and sour cream

Seriously Curious:  What's your all-time, absolute favourite comfort food and what makes it so deliciously comforting?  Shoot me a short comment below or answer my question @ The Perfect Avocado on Facebook.  I really want to know!

.

Thursday, June 16, 2011

Daikon Do

Have you ever wondered what to do with a daikon radish?  Yeah... me too!  I've always grated them for green salads; but, with our own pretty patch of white icicles growing in the garden, thought I'd try to dig a little deeper and do something new.  With such a solid, strong bite (not quite the kick of a horse, but definitely a good punch in the mouth) it would be a shame to not use them for a greater good.

daikon

I was preparing burgers for lunch and so, inspired by my undying love for horseradish with beef and some lingering thoughts of recently made red radish slaw (that I still haven't told you about it - but I will), thought a quick pickled daikon shred would be an interesting accompaniment.  Not such a far reach from grating in to salad, but different enough for me (and good enough to share).

daikon and company

First, peel away the woody exterior of the daikon, along with a few good sized carrots.  Shred them using the smallest grater holes you have access to, sliding the vegetables lengthwise to produce the longest, thinnest strands possible. Set them aside.

peeled carrots and daikon

lengthwise shred

shredded daikon

Next, combine 3 tablespoons of apple cider vinegar, 1 teaspoon of soy sauce, 1 teaspoon sugar, 1/2 teaspoon salt and a pinch of powdered ginger in a jar with a tight fitting lid.  Feel free to just pour, dash and adjust as you see fit (I would have done just that, but I've been trying to measure my amounts to make it easier to share with you).  If you are following my measurements, please note that when I speak of tablespoons and teaspoons I'm not using measuring spoons - I'm just opening up my silverware drawer and pulling out utensils (soup spoon, tea spoon...).  Give the mix a quick stir to combine the ingredients (choose your own spoon).

Add the veggie shreds to the jar and close the lid tightly.  Give the jar a good shake, turning it upside down and sideways to get everything mixed up nicely.  Put the jar in the fridge (or leave on the counter if you will be eating shortly) - give it a good shake or turn it from top to bottom (or lay on its side) every so often.  The longer you let this marinate, the better it will taste (but the stinkier it will smell... sorry).

jar for shakey shake


beef burgers w/sambal oelek mayo, daikon shred & grilled zucchini

A terrific topping for the burgers, this quick pickled daikon shred would work well with all kinds of meals.  Try it on pulled pork sandwiches or roll it up inside a wrap for an added touch of texture and fresh burst of flavour.  Or just eat it straight out of the jar.  It's too easy not to try and you really can't go wrong.


quick pickled daikon shred
Help!  What else can we do with our daikons?  Leave me a comment below or visit The Perfect Avocado on facebook - just please, PLEASE... let me know.
.

Monday, June 13, 2011

Pretty Pleased With Cherries On Top

I was always one of those kids who, when dining out, would stalk every cocktail drinker at the table for their maraschino cherry.  I was also one of those kids who, when lucky enough to be served a cherry in her mocktail, would snatch it quickly off the top and pop it in her mouth like a pre-drink appetizer, then watch as her sister would leisurely sip away at her drink, cherry falling lower and lower in the glass as she tauntingly saved the best for last.  I worried, for some reason, that if a cherry managed to reached the bottom of such a tall glass, it would be out of reach forever and, with that, any miniscule possibility of a successful bribe to receive it, gone for good.  Imagine the look on my face when our good friend arrived at our door last week with a bag full of fresh, hand-picked cherries.  The exact cherries that become, in fact, the magnificent maraschino.

marasca cherries

Literally, the name maraschino refers to the Croatian marasca cherry and the maraschino liqueur made from it.  When the cherries are preserved in the liqueur, they are known as "maraschino cherries".  The impossibly red cocktail cherries of today that we all know (and I love) typically use a sweet cherry variety rather than the sour marascas and are preserved in a brining solution instead of liqueur - a far cry from their historical origin.  It is likely (and quite sad) that I have never actually tasted a true maraschino.  Feeling a bit fooled, and a lot ripped off, my initial impulse was to make my own maraschino cherries but, after considering the two years necessary to mature the distillate (never mind having to track down an ashwood vat), I quickly vetoed the idea (you know me and my instant gratification issues...).  Yes, I could have easily run out an bought a bottle of maraschino liqueur to pour over the lot, but it seemed to me like cheating.  
 
cherries and pits

Having recently made rustic apple tart, I eliminated the idea of baking a pie and, wanting to give a portion of whatever I ended up making back to the friend who provided the cherries, crossed off the question of crisp (though, if Andy would have been coming to visit, surely the outcome would have been different).  Still, even without a plan, I knew that, regardless of what I ended up doing with the cherries, they would need their pits removed.  Armed with my makeshift cherry pitter (an unfolded paperclip - seriously! - hold the cherry in one hand and, with your other hand, insert the paperclip into the point of the cherry where the stem once was, slide it down along the edge of the pit until it reaches the bottom, run the paperclip around the circumference of the pit to loosen it from the fruit, squeeze the pit out with the hand you are holding the cherry with, repeat. repeat. repeat. repeat....) I went to work.  With numerous cherry pitting sessions spread across multiple days, I had plenty (PLENTY.) of time to think up something spectacular to do with them.
 
paperclip cherry pitter

I felt like I was finally getting somewhere with my cherry pitting efforts when Saša managed to scavenge my 'already pitted' bowl to whip up a warm prošek cherry sauce (he bribed me with ice cream - what else could I do?).  Rather than considering my once again empty bowl a 'two steps back' scenario, I used the sauce as a trial run taste test to see what these ruby red beauties could do (I know, as if anything over ice cream could ever be considered 'two steps back' - but I had to give him a hard time for swiping them, right?)  They held their shape when heated, had a slightly tart flavour and bursted with juicy deliciousness when you popped them in your mouth.  More like an oversized blueberry than a miniture version of the giant cherries that come off our British Columbia trees, I was reminded of an insanely delicious berry bar that I'd once had in a random coffee shop in Calgary - a bar insanely delicious enough that I'm still thinking about it ten years later.

a juicy mess

I found a recipe online for Willow's Sour Cherry Bars.  According to the recipe posted by Kathleen Williams, Willow is a local caterer in Wenatchee, Washington.  While I don't know Willow, I do know Wenatchee - and I know that Wenatchee knows cherries.   I put my faith in Willow and gathered my goods.  I'm glad I did.

I won't go in to great detail about how to make these sour cherry bars, as the recipe is already provided in a nice, easy, printable format - probably much easier to deal with than trying to follow my blah blah blah.  What I will do for you though, is let you in on my tweaks and edits - just in case you trust my judgement and want a few tips from someone who has tasted them.

simple hand-cut crust

My first suggestion is to double the crust.  Why?  it didn't seem like enough for me once I patted it into my pan.  I ended up making a second batch and patting it over the first.  Super glad I made that call as these are pretty sticky little treats and they need something substantial to hold the gooey topping.

My second thought (which was my initial instinct) would be to reduce the amount of sugar.  These were pretty darn sweet to be called sour cherry bars.  I stuck to the recipe as written, and perhaps my 'too sweet' was a result of doubling the crust (maybe double the crust but omit the second amount of powdered sugar?).  I really don't know... but next time I make these (and there will be a next time) I will definitely pull back on the sweet.

Finally, listen to Willow when she warns against chopping fruit to finely - you definitely want to maintain the integrity of the fruit.  Not wanting to lose the pop of my berry like cherries, I decided to keep them whole (another good choice on my part) and, with every bite, they would burst in my mouth like little cherry bombs.

straight from the oven

I was a bit concerned when I pulled the pan from of the oven; the cherries now hidden beneath a brownish crust.  My fears melted as I later cut into them, the crust sinking down to reveal the glistening cherries, leaving just enough baked sugar on top to add a touch of bronze spackle (like a butter tart filled with fresh fruit!).  They were perfect for sharing (meaning they were easy to cut, store and transport - they were, admittedly, a little bit hard to part with).  I'll take Willow's suggestion and try peaches, plums and rhubarb, but really am looking forward to the next marasca season; I was pretty pleased with these cherries on top.

sour cherry bars


Wednesday, May 25, 2011

Chicken of Circumstance

Sometimes I'm completely backwards with my meal planning method. Instead of taking meat from the freezer and finding something to accompany it, I will decide I'm in the mood for, say, pineapple, and then work out a meal to incorporate it. Such was the situation a few days ago when I found myself at the market, blindsided by a basket of beautiful beans.

green and gorgeous

But this is not about the beans. Their duty is done. They sat in wait in their raw wooden crate being all green and gorgeous until I just had to have them.  They were the bait that lead to the switch in the story of meal planning backwards.

Bag in hand, knowing that I couldn't just serve up a plate full of green beans for dinner (though, I actually could - and would be perfectly happy with it), it was now my job to drum up the rest of the meal.  I began by banging my green bean repertoire around in my brain - sauteed? steamed? side dish? stir fry? lemon? garlic? almond? sesame? SESAME! oh-yes-a-me.  And the rest came tumbling after.

This simple sesame chicken, victim of my vegetable circumstance, is a delightful dish that can be made in the same amount of time it takes to cook some rice and steam some beans (and half the time it takes to read this article). If you don't require an obscene amount of meat, it can also be quite economical.  One half of a large boneless, skinless chicken breast feeds the two of us.  If you are a raging carnivore, or are feeding a family of more, feel free to double, triple or mass produce. It will all work out fine (and leftovers are always nice too).

beans on board

First, rinse your breast (the chicken.. the CHICKEN!) and pat dry with a paper towel  Here we could insert an entire conversation about whether we should or shouldn't rinse our chicken prior to cooking - but, since it's my blog, and I do, that's the first step. I guess some may argue that the probability of cross contamination increases if you rinse due to water splashing on to items within close proximity, but I'm not recreating a scene reminiscent of Flashdance here, I'm simply running a single breast under a slow flowing tap, wrapping it in a double paper towel and placing it on my glass board - sans splash - zero drips.  What more can I say? I like my breasts bathed and swaddled before they hit the pan.  Anyway... do rinse or don't rinse, then, if your breasts are thick like mine (stop now), slice through horizontally to make two pieces of equal thickness, then cut into a-bit-smaller-than-bite-size cubes.

one half boneless, skinless chicken breast...

Now, I'm fairly confident that most of you (aside from, perhaps, the raging carnivores) will share my opinion that raw meat is generally not an attractive subject matter for photographs; but, after a recent conversation in which a friend could not grasp, through my words, the concept of horizontal slicing (forgive her, English is not her first language), I have reluctantly decided to illustrate. Please bear with me. Cooking isn't always pretty.  Besides, all this talk about breasts and photos of naked chicks should get me a few extra hits on my blog; my Naked Noodles post is extremely popular, and not because Googlers are searching for plain ol' spaghetti (sorry to disappoint, folks).


... horizontally sliced becomes two...

...and then cubed.

Ok, back to the task at hand.  Sauté a handful of diced onion and a couple cloves of chopped garlic in a small amount of oil (I use olive - and just enough to coat the bottom of the pan and to carry the flavours).  When the onion is soft, add the cubed chicken and allow to cook through until no longer pink.

sesame seeds, dried chili pepper flakes, honey, sesame oil, soy sauce

While the chicken, garlic and onions are happily cooking on the stove, make your sauce.  In a small bowl or cup, stir together a large spoonful of honey, an equal amount of soy sauce, a touch of sesame oil (depending on your taste because it is powerful stuff... I probably used about 1/4 tsp) and 75mL (ish) of water.  Add 1/4 tsp powdered ginger (unless you are lucky enough to have fresh) and 1 tsp cornstarch; whisk until smooth then finish with a dash or two of dried chili pepper flakes (according to taste).  Remember that this is enough sauce for one half chicken breast - increase the amounts if you'll be using more.

When the chicken is cooked through, add the sauce to the pan and stir until it becomes slightly thickened (add a bit more water if the sauce is too thick).  Stir in a small spooful of toasted sesame seeds; cover and simmer for about ten minutes (or until your rice and green beans are done).

Assemble.  Serve.  Love.

sesame chicken w/ green beans and rice

I generally lack imagination and enthusiasm when my starting point is meat.  Backwards works best for me. Instead of torturing myself with "what should I do with this chicken?" while pacing from cupboard to cupboard with occasional stops at the fridge, I'll take a trip to the market (or garden!), allow myself to be swayed by a seasonally spectacular vegetable and become inspired to create a meal. 


Seriously Curious:  Do you rinse your chicken before cooking, or is it just me?!  Shoot me a short comment below, or visit The Perfect Avocado on Facebook to tell me why you do (or don't).  I've really got to know!
.