Saturday, November 26, 2011

Pinch Hit Salsa

Is the clock dangerously close to dinner time and you still have no idea what to make?  Need something to eat before you run out the door to avoid dying of starvation later?  Don't feel like cooking but really want something to eat?  My favourite go-to meal has always been quesadilla.  Throw something on a tortilla, add cheese, fold, fry, serve with lettuce, salsa and sour cream.  Fast.  Easy.  Delicious.

Unless you happen to be on an island in the middle of the Adriatic Sea.  

Fast.  Easy.  Delicious.  *sigh*... well, one out of three ain't bad.  There's never any need for hurry on this island and delicious is enough for me.

quesadilla:  fast. easy. delicious.

As I've told you before, I've managed to conquer homemade tortillas and, while not as fast as opening a package, it really doesn't take me much time to whip up a batch of six.  We always have cheese (though I do miss a good cheddar), our garden is still full of lettuce and sour cream, or kiselo vrhnje (the single most difficult item for me to pronounce in all of the Croatian language), is readily available at all local stores.

But wait.  A quesadilla without salsa?  That's a total quesa-don't-a.

Knowing that salsa is rare to find here and, when it is found, is barely affordable, I had grand plans to make a lasting batch with some of the lovely tomatoes from the garden this summer.  Alas, being the tomato fiends (that's right, fiends) that we are, we ate every single glorious red tomato that our plants produced and set aside none for making anything.  Oh the best laid plans....

But you know me; I absolutely refused to watch my go-to meal get up and leave so, after spending a good ten minutes staring at the cupboard shelves trying to materialize a large jug of Pace Picante out of thin air, I grabbed the lone can of tomatoes that was already physically present and decided to make my own.

flat leaf parsley

This is probably the easiest salsa you will ever make.  It might not be the best you've ever had, but it will take far less time than a trip to the supermarket and will cost much less than grabbing a jar in the chip aisle at the convenience store.  And it does taste fresh, even with canned tomatoes.  Are you ready?

Dump the following ingredients in to your blender, food processor or a receptacle deep and narrow enough to accommodate a hand blender without spraying salsa all over your kitchen (I used the hand blender - and no, before you assume I am suggesting this from experience, I did not make splatters):

  • 1 400g (14.5 oz) can of whole, unpeeled tomatoes, undrained (you'd probably be fine with diced, stewed or chopped tomatoes since they will be salsalated later anyway - but that's what I used)
  • 1 good sized onion, chopped
  • 2 cloves garlic, minced (you could go with more - my tummy won't let me do more raw garlic than that)
  • 1/4 cup fresh flat leaf parsley (I would actually prefer cilantro, but will need to wait until we grow some)
  • 1 minced hot pepper (use your own judgement on this one)
  • 2 tsp lime juice (fresh if you can)
  • 1 tsp vinegar
  • 1 tsp salt (more or less...)
  • 1/2 tsp sugar
  • 1/4 tsp pepper
  • few shakes cayenne pepper
Now whir it all up with your mixer of choice and.... snappity snap... salsa!  If you like it a bit more chunky, dice one of the tomatoes and hold back half of the chopped onions and stir them in after you've blended (if you've got fresh tomatoes on hand you could dice one up and add it as well).

pinch hit salsa

As with any salsa, the flavours are as varied as the people who eat it.  Some like it mild and some like it hot; you'll need to adjust the heat level according to your own personal taste.  The salt factor is negotiable too; if you'll be doing the dip with salty chips you might want to hold back a bit.  If you like it sweeter, add more sugar.  You get my drift.... Use this as a base and make it your own.

salsa in action

Quesadillas are once again fast(ish), easy and, as always, delicious.  You probably have a nice big jug of Pace sitting on the top shelf of your fridge but, if you find yourself without, this is definitely a hit in a pinch.

PS. Next year we'll grow more tomatoes.
.

Thursday, June 16, 2011

Daikon Do

Have you ever wondered what to do with a daikon radish?  Yeah... me too!  I've always grated them for green salads; but, with our own pretty patch of white icicles growing in the garden, thought I'd try to dig a little deeper and do something new.  With such a solid, strong bite (not quite the kick of a horse, but definitely a good punch in the mouth) it would be a shame to not use them for a greater good.

daikon

I was preparing burgers for lunch and so, inspired by my undying love for horseradish with beef and some lingering thoughts of recently made red radish slaw (that I still haven't told you about it - but I will), thought a quick pickled daikon shred would be an interesting accompaniment.  Not such a far reach from grating in to salad, but different enough for me (and good enough to share).

daikon and company

First, peel away the woody exterior of the daikon, along with a few good sized carrots.  Shred them using the smallest grater holes you have access to, sliding the vegetables lengthwise to produce the longest, thinnest strands possible. Set them aside.

peeled carrots and daikon

lengthwise shred

shredded daikon

Next, combine 3 tablespoons of apple cider vinegar, 1 teaspoon of soy sauce, 1 teaspoon sugar, 1/2 teaspoon salt and a pinch of powdered ginger in a jar with a tight fitting lid.  Feel free to just pour, dash and adjust as you see fit (I would have done just that, but I've been trying to measure my amounts to make it easier to share with you).  If you are following my measurements, please note that when I speak of tablespoons and teaspoons I'm not using measuring spoons - I'm just opening up my silverware drawer and pulling out utensils (soup spoon, tea spoon...).  Give the mix a quick stir to combine the ingredients (choose your own spoon).

Add the veggie shreds to the jar and close the lid tightly.  Give the jar a good shake, turning it upside down and sideways to get everything mixed up nicely.  Put the jar in the fridge (or leave on the counter if you will be eating shortly) - give it a good shake or turn it from top to bottom (or lay on its side) every so often.  The longer you let this marinate, the better it will taste (but the stinkier it will smell... sorry).

jar for shakey shake


beef burgers w/sambal oelek mayo, daikon shred & grilled zucchini

A terrific topping for the burgers, this quick pickled daikon shred would work well with all kinds of meals.  Try it on pulled pork sandwiches or roll it up inside a wrap for an added touch of texture and fresh burst of flavour.  Or just eat it straight out of the jar.  It's too easy not to try and you really can't go wrong.


quick pickled daikon shred
Help!  What else can we do with our daikons?  Leave me a comment below or visit The Perfect Avocado on facebook - just please, PLEASE... let me know.
.

Wednesday, May 25, 2011

Chicken of Circumstance

Sometimes I'm completely backwards with my meal planning method. Instead of taking meat from the freezer and finding something to accompany it, I will decide I'm in the mood for, say, pineapple, and then work out a meal to incorporate it. Such was the situation a few days ago when I found myself at the market, blindsided by a basket of beautiful beans.

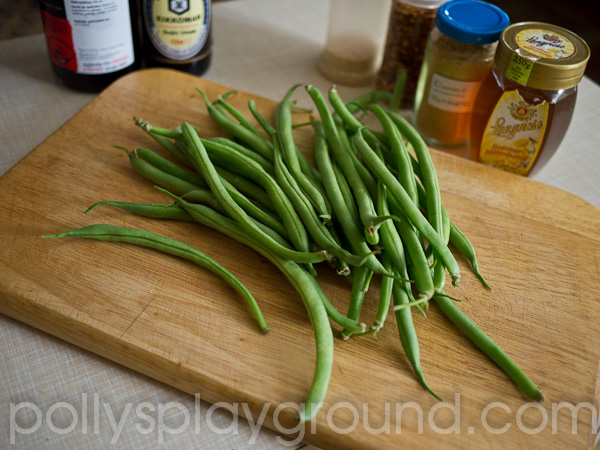
green and gorgeous

But this is not about the beans. Their duty is done. They sat in wait in their raw wooden crate being all green and gorgeous until I just had to have them.  They were the bait that lead to the switch in the story of meal planning backwards.

Bag in hand, knowing that I couldn't just serve up a plate full of green beans for dinner (though, I actually could - and would be perfectly happy with it), it was now my job to drum up the rest of the meal.  I began by banging my green bean repertoire around in my brain - sauteed? steamed? side dish? stir fry? lemon? garlic? almond? sesame? SESAME! oh-yes-a-me.  And the rest came tumbling after.

This simple sesame chicken, victim of my vegetable circumstance, is a delightful dish that can be made in the same amount of time it takes to cook some rice and steam some beans (and half the time it takes to read this article). If you don't require an obscene amount of meat, it can also be quite economical.  One half of a large boneless, skinless chicken breast feeds the two of us.  If you are a raging carnivore, or are feeding a family of more, feel free to double, triple or mass produce. It will all work out fine (and leftovers are always nice too).

beans on board

First, rinse your breast (the chicken.. the CHICKEN!) and pat dry with a paper towel  Here we could insert an entire conversation about whether we should or shouldn't rinse our chicken prior to cooking - but, since it's my blog, and I do, that's the first step. I guess some may argue that the probability of cross contamination increases if you rinse due to water splashing on to items within close proximity, but I'm not recreating a scene reminiscent of Flashdance here, I'm simply running a single breast under a slow flowing tap, wrapping it in a double paper towel and placing it on my glass board - sans splash - zero drips.  What more can I say? I like my breasts bathed and swaddled before they hit the pan.  Anyway... do rinse or don't rinse, then, if your breasts are thick like mine (stop now), slice through horizontally to make two pieces of equal thickness, then cut into a-bit-smaller-than-bite-size cubes.

one half boneless, skinless chicken breast...

Now, I'm fairly confident that most of you (aside from, perhaps, the raging carnivores) will share my opinion that raw meat is generally not an attractive subject matter for photographs; but, after a recent conversation in which a friend could not grasp, through my words, the concept of horizontal slicing (forgive her, English is not her first language), I have reluctantly decided to illustrate. Please bear with me. Cooking isn't always pretty.  Besides, all this talk about breasts and photos of naked chicks should get me a few extra hits on my blog; my Naked Noodles post is extremely popular, and not because Googlers are searching for plain ol' spaghetti (sorry to disappoint, folks).


... horizontally sliced becomes two...

...and then cubed.

Ok, back to the task at hand.  Sauté a handful of diced onion and a couple cloves of chopped garlic in a small amount of oil (I use olive - and just enough to coat the bottom of the pan and to carry the flavours).  When the onion is soft, add the cubed chicken and allow to cook through until no longer pink.

sesame seeds, dried chili pepper flakes, honey, sesame oil, soy sauce

While the chicken, garlic and onions are happily cooking on the stove, make your sauce.  In a small bowl or cup, stir together a large spoonful of honey, an equal amount of soy sauce, a touch of sesame oil (depending on your taste because it is powerful stuff... I probably used about 1/4 tsp) and 75mL (ish) of water.  Add 1/4 tsp powdered ginger (unless you are lucky enough to have fresh) and 1 tsp cornstarch; whisk until smooth then finish with a dash or two of dried chili pepper flakes (according to taste).  Remember that this is enough sauce for one half chicken breast - increase the amounts if you'll be using more.

When the chicken is cooked through, add the sauce to the pan and stir until it becomes slightly thickened (add a bit more water if the sauce is too thick).  Stir in a small spooful of toasted sesame seeds; cover and simmer for about ten minutes (or until your rice and green beans are done).

Assemble.  Serve.  Love.

sesame chicken w/ green beans and rice

I generally lack imagination and enthusiasm when my starting point is meat.  Backwards works best for me. Instead of torturing myself with "what should I do with this chicken?" while pacing from cupboard to cupboard with occasional stops at the fridge, I'll take a trip to the market (or garden!), allow myself to be swayed by a seasonally spectacular vegetable and become inspired to create a meal. 


Seriously Curious:  Do you rinse your chicken before cooking, or is it just me?!  Shoot me a short comment below, or visit The Perfect Avocado on Facebook to tell me why you do (or don't).  I've really got to know!
.

Monday, May 24, 2010

When Life Gives You Lemons...

One of my favorite things about island life is the abundant supply of lemons and, with our own little tree in the garden, the availability of freshly squeezed juice just mere steps away.  As a long time lover of lemons (and generally all things tart), I've been using them wherever I possibly can.  Lemonade, cake, chicken, rice, bars, tea, fish... The list goes on, yet still I continue to search out new ways to cash in on our yellow bounty.

our little lemon tree

The other day a friend asked me if I had any good dessert recipes.  With my standard disclaimer that I am more cook than bake, I asked him what type of desserts he liked.  When he responded with liquid-ish items, including yogurt and vla, my interest peaked; these are the types of desserts that are right up my alley.  For those who don't know what vla is (don't worry, neither did I), it is a Dutch custard product that, to the best of my wiki knowledge, is similar to flan. This same friend, just moments before posing the dessert question, had recited a recipe for eggs that incorporated lemon juice.  I took a quick mental stock.  I knew he liked lemon.  I knew he ate eggs.  I knew he enjoyed the consistency of custards.  I knew exactly what to make.

bowl of lemons

Lemon curd (or spread) is one of those items I always find myself stopping to look at in the grocery store. I consider it and then put right back on the shelf.  Aside from the exaggerated price, I am generally disappointed with products containing prefabricated pie filling (blame my mom for spoiling me with homemade lemon meringue) and I am quick to assume that the fancy jelly aisle jars contain precisely that.  It looks good in theory, but I know better than to be tempted by pretty packaged promises.

juicer w/cut lemon

Fresh lemon curd is seriously as simple as zesting a couple of lemons, squeezing out the juice and mixing it with sugar, eggs, and butter.  I'm not going to go through the motions of telling you exactly how to make it, instead I will just cut to the chase and suggest that you use the recipe posted at joyofbaking.com; the results were simply to die for and I couldn't explain it any better myself.  Do yourself one better and bake her cream scones too.  You'll thank me (and Joy of Baking) for it later.

lemon curd

At first taste, I immediately announced that the spread was way too sweet.  Then I instantly changed my mind and deemed it far too tart.  My confused mouth sent mixed messages to my brain, and I took a good couple of minutes to battle it out in my mind; Sweet?  Tart!  Sweet!  Tart?   I argued with myself as I continued taking tastes.  Whatever it was, it was good, so we loaded our basket with scones and went out to the terrace to enjoy the luscious lemon curd in all of its full flavoured glory. 

lemon curd w/cream scones

Sweet...  Tart...  Sweet... Tart...  I honestly couldn't decide.  That's how I knew it was perfect.
.

Thursday, April 29, 2010

Drunken Applesauce

Sometimes deciding what to make for dinner is somewhat of a backwards task.  I never seem to say, "lets have chicken" and then figure out what to make with it.  No, instead it's more like, "I feel like gravy" or "sauteed mushrooms would be nice" and then build a meal from there.  This happened the other day while staring at my overabundance of apples which, unlike my disappearing banana problem, seem to magically multiply like rabbits by some unexplained (but seriously true) phenomenon.  I am certainly not complaining; I love apples and eat them almost daily - I just have no idea why that bowl never gets empty.  Anyway, as I picked through the bowl of apples looking for a prime choice to snack on, I was struck by an incredible craving for applesauce.

Because applesauce is so embarrassingly easy to make, I am actually baffled as to why anyone (including myself) bothers to buy it in cans or in jars.  Aside from easy, and even better, is the ability to tweak it specifically to your exact taste or accompanying meal by using different varieties of apples and experimenting with a countless combination of spices, juices and/or additional fruits.  Most recently I chose wine because, as with the apples, I am blessed with an ever-flowing supply.

Drunken Applesauce

First, pour a nice large glass of dry red wine.  This is (mostly) for you to enjoy, though some is for the apples, so don't drink it all in one place.  Skipping this step is not optional; if you don't have wine that is good enough to drink, this applesauce isn't for you.  So go ahead and pour; I'll wait.

peeling apples

Good.  Now that you have your glass (cheers!), select four large apples.  I'm not picky about type, but I do prefer firm, crisp apples rather than soft, mealy ones.  Peel, quarter and core the apples, then slice each quarter in to a medium saucepan.  Add about 1/3 cup (80 mL) of your wine to the apples.  It will seem like the wine disappears (actually, I meant the wine in the pot of apples, not your glass - but by all means, top yourself up.  I'll wait). Anyway, don't worry about the seeming lack of liquid; it is more than enough to make a good saucy sauce. 

Sweetness is something you will need to determine for yourself depending on the variety of apples used and what level of sweet/tart you desire.  For average's sake I will say add one level soup spoon of sugar (about 1 Tbsp); I use less (just a sprinkle of turbinado) and you may want more or maybe even none.  My advice is to aim for the lesser side of sweet - you can always increase it later.

precooked drunken applesauce

Add a bay leaf to the pot, then cover and cook over medium heat, stirring occasionally.  As the apples begin to soften, mash them a bit with your spoon.  After about 20 minutes, remove the lid and the bay leaf; simmer and stir to reduce the liquid to desired consistency.  Add a small spoonful of salted butter (about 1 tsp) and stir until melted - trust me, it's worth it.  Your applesauce will be chunky (that's how I like it) but can easily be processed until smooth with a hand blender or potato masher.

after twenty minutes

Drunken Applesauce is delicious both hot and cold.  If you are like me and have planned a meal around the sauce, be sure to sneak a little bit out of the pot for later so you can try it both ways.  Better yet, double or triple the amounts of everything - just please don't forget that you've got this on the burner (or blame me for tomorrow's headache) if you also double or triple the amounts of nice large glasses of dry red wine for yourself.  Cheers!

oven crisp pork chops | drunken applesauce | green peas | garlic roasted potatoes

.