Friday, December 16, 2011

Jiggly Bits

Back in the day (which, thanks to my non-native English speaking friend who once stopped me in mid-conversation to ask why I always talk about "bacon days", is now and forever referred to as such) I worked in the produce department at our local grocery store.  My shifts were spent sweeping up onion skins, promising customers that we honestly weren't hiding more tomatoes in storage and keeping my eye on the apples (and removing the many with toddler sized bite marks).  My best friend (The Other Hannah) worked in the bakery, conveniently located at the far end of the produce aisle (which wasn't very far, because the store was very small).  When she wasn't busy squeezing fillings into danish or spraying imitation kirsch on black forest cakes, she'd wander in to my section to see what was new and good.

Apart from the typical fresh fruits and vegetables, our produce department sometimes stocked specialty items, often some sort of confectionery, and, for a long while, we two Hannahs debated whether sharing the cost of some Aplets & Cotlets (apparently a Pacific Northwest delicacy) would merit each of us chipping in thirty minutes of wage.  The packaging promised tidbits of apples or apricots and pieces of walnuts that were magically suspended in a glistening gel candy then dredged in a powdery sugar coat.  They were totally intriguing - in a not exactly appetizing kind of way.  But still...

apples, walnuts, powdered sugar

This memory resurfaced last week as I passed by the dining room table, our fruit basket filled with apples aside an overflowing bowl of mixed nuts.  Out of sheer curiosity I returned to my laptop, Googling "Aplets" to see if they were still in existence (they are) and, to my surprise (or perhaps my demise), I also found an online recipe.  Figuring that Aplets might be a possible way to integrate a tiny taste of home into my Christmas treat baskets this year, I read through the ingredients in this posted version and, with great excitement, confirmed that I had everything on hand that I'd need to make them.  Then I got cracking...

And when I say I got cracking, I should eliminate your notion that I ran to the kitchen and whipped up a fantastic batch in the 25 minute prep time as listed.  No, when I say I got cracking, I mean I got cracking; sack of walnuts in one hand, nutcracker in the other, I extracted and chopped until I reached one cup of nuts.

cracked walnut

one cup of hand cracked walnuts

The next morning, while sipping my first cup of coffee, I re-read the recipe, consciously aware of the footnote suggesting that lemon juice, of which I have an endless supply, would be a suitable substitute for rose water, of which I have none.  My half-caffeinated brain argued otherwise. Replace roses with lemons?  While lemons and roses are both deliciously aromatic and both have quite distinct flavours, they are so far from being the same that I just wasn't buying the trade.  And so, before coffee number two, I was Googling "how to make rose water".

fresh cut red rose

I know what you're thinking.  Oh my-lanta!  She made her own rose water!  Yes, and I could let you go on believing that I'm some culinary chemist wizard, but instead I'll tell you the truth.  I learned, through a terrific tutorial at We Like Making Our Own Stuff, a blog with straight forward instructions and a helpful pictorial, that making rose water is a cinch.  Using six basic items (a pot, water, roses, ice, a bowl and a rock - it doesn't get much simpler than that), and with my lovely assistant, "honey" (to keep the lid from getting pushed off the pot), I distilled myself a batch.

pot with inverted lid, ice pack and my lovely assistant, "honey"

Now that I had my rose water, I was ready to go nuts with my Aplets.  I peeled my apples, simmered and pureed them, and continued to follow the recipe as instructed.  When all was said and done, I had a shimmering pan full of apple-walnutty goodness; I couldn't wait for it to set.

I waited...

And I waited...

And I waited some more.

Humidity and gelatin are not good playmates.

pan of apple walnutty goodness

The next day (and more than 24 hours after I'd poured my jelly to set), I decided that whatever will be, will be.  With a sharp, oiled knife I began to slice and carefully lifted the long strips of confection out of the pan.  I chopped each strip in to bite sized squares and started to roll them in sugar.

Here's when things got sticky.

After the first few pieces were rolled, they immediately soaked up the sugar.  Observing my syrupy mess of squares, I opted to leave them to set for yet another day.  Perhaps they'd firm up, or dry out... or something?  I placed them gently on a paper towel lined tray, covered them with a mesh dome and left them alone 'til tomorrow.  

sugar coating:  round one

One week (yep, you heard me) and one roll of paper towel later, my Aplets were ready (in other words, I was sick of seeing that tray).  My patience had prevailed.  They had (sort of) firmed up.  As I finally began to roll them in sugar, I rewarded my own perseverance by plucking a finished-as-it's-ever-going-to-get candy from the cup and popping it in my mouth.

And I was instantly reminded of the ending to the story of us coveting those cotlets 'bacon days' at the store.  We did end up buying them.  We did end up eating them.  I did not end up liking them at all.  And why would I? Jell-O makes me gag.  Molded salads scare me.  I obviously don't. like. gelatinous. foods.  Double U Tee Eff was I thinking? ...

aplets

In all fairness, there are a plethora of people who adore Aplets & Cotlets and my personal distaste should not reflect poorly on the original product as sold.  If jiggly bits are your thing, the recipe I used is probably even adequately delightful;  but, defeated by humidity and (still!) dissolving sugar, I just could not bring myself to gift these away.  Suddenly, like the eight year old me who once begged my mom for a can of TaB, even as she insisted I wouldn't like it, and only because the can was pink, I was stuck with a tray of nutty applish jelly goo squares that, one cup of hand cracked nuts and a small bottle of homemade rose water later, I couldn't let go to waste and would need to choke back on my own.  Ugh.

At least I learned how to make rose water.  I'll be using the rest in our New Year's Eve champagne.

.

'tis the season for sharing!  If you know someone who'd like this (or any other) post, just click on one of my spanky new share icons below to pass it on.  You can also share your thoughts about the post using my new disqus comment system - go on... don't be shy!
. 

Monday, June 13, 2011

Pretty Pleased With Cherries On Top

I was always one of those kids who, when dining out, would stalk every cocktail drinker at the table for their maraschino cherry.  I was also one of those kids who, when lucky enough to be served a cherry in her mocktail, would snatch it quickly off the top and pop it in her mouth like a pre-drink appetizer, then watch as her sister would leisurely sip away at her drink, cherry falling lower and lower in the glass as she tauntingly saved the best for last.  I worried, for some reason, that if a cherry managed to reached the bottom of such a tall glass, it would be out of reach forever and, with that, any miniscule possibility of a successful bribe to receive it, gone for good.  Imagine the look on my face when our good friend arrived at our door last week with a bag full of fresh, hand-picked cherries.  The exact cherries that become, in fact, the magnificent maraschino.

marasca cherries

Literally, the name maraschino refers to the Croatian marasca cherry and the maraschino liqueur made from it.  When the cherries are preserved in the liqueur, they are known as "maraschino cherries".  The impossibly red cocktail cherries of today that we all know (and I love) typically use a sweet cherry variety rather than the sour marascas and are preserved in a brining solution instead of liqueur - a far cry from their historical origin.  It is likely (and quite sad) that I have never actually tasted a true maraschino.  Feeling a bit fooled, and a lot ripped off, my initial impulse was to make my own maraschino cherries but, after considering the two years necessary to mature the distillate (never mind having to track down an ashwood vat), I quickly vetoed the idea (you know me and my instant gratification issues...).  Yes, I could have easily run out an bought a bottle of maraschino liqueur to pour over the lot, but it seemed to me like cheating.  
 
cherries and pits

Having recently made rustic apple tart, I eliminated the idea of baking a pie and, wanting to give a portion of whatever I ended up making back to the friend who provided the cherries, crossed off the question of crisp (though, if Andy would have been coming to visit, surely the outcome would have been different).  Still, even without a plan, I knew that, regardless of what I ended up doing with the cherries, they would need their pits removed.  Armed with my makeshift cherry pitter (an unfolded paperclip - seriously! - hold the cherry in one hand and, with your other hand, insert the paperclip into the point of the cherry where the stem once was, slide it down along the edge of the pit until it reaches the bottom, run the paperclip around the circumference of the pit to loosen it from the fruit, squeeze the pit out with the hand you are holding the cherry with, repeat. repeat. repeat. repeat....) I went to work.  With numerous cherry pitting sessions spread across multiple days, I had plenty (PLENTY.) of time to think up something spectacular to do with them.
 
paperclip cherry pitter

I felt like I was finally getting somewhere with my cherry pitting efforts when Saša managed to scavenge my 'already pitted' bowl to whip up a warm prošek cherry sauce (he bribed me with ice cream - what else could I do?).  Rather than considering my once again empty bowl a 'two steps back' scenario, I used the sauce as a trial run taste test to see what these ruby red beauties could do (I know, as if anything over ice cream could ever be considered 'two steps back' - but I had to give him a hard time for swiping them, right?)  They held their shape when heated, had a slightly tart flavour and bursted with juicy deliciousness when you popped them in your mouth.  More like an oversized blueberry than a miniture version of the giant cherries that come off our British Columbia trees, I was reminded of an insanely delicious berry bar that I'd once had in a random coffee shop in Calgary - a bar insanely delicious enough that I'm still thinking about it ten years later.

a juicy mess

I found a recipe online for Willow's Sour Cherry Bars.  According to the recipe posted by Kathleen Williams, Willow is a local caterer in Wenatchee, Washington.  While I don't know Willow, I do know Wenatchee - and I know that Wenatchee knows cherries.   I put my faith in Willow and gathered my goods.  I'm glad I did.

I won't go in to great detail about how to make these sour cherry bars, as the recipe is already provided in a nice, easy, printable format - probably much easier to deal with than trying to follow my blah blah blah.  What I will do for you though, is let you in on my tweaks and edits - just in case you trust my judgement and want a few tips from someone who has tasted them.

simple hand-cut crust

My first suggestion is to double the crust.  Why?  it didn't seem like enough for me once I patted it into my pan.  I ended up making a second batch and patting it over the first.  Super glad I made that call as these are pretty sticky little treats and they need something substantial to hold the gooey topping.

My second thought (which was my initial instinct) would be to reduce the amount of sugar.  These were pretty darn sweet to be called sour cherry bars.  I stuck to the recipe as written, and perhaps my 'too sweet' was a result of doubling the crust (maybe double the crust but omit the second amount of powdered sugar?).  I really don't know... but next time I make these (and there will be a next time) I will definitely pull back on the sweet.

Finally, listen to Willow when she warns against chopping fruit to finely - you definitely want to maintain the integrity of the fruit.  Not wanting to lose the pop of my berry like cherries, I decided to keep them whole (another good choice on my part) and, with every bite, they would burst in my mouth like little cherry bombs.

straight from the oven

I was a bit concerned when I pulled the pan from of the oven; the cherries now hidden beneath a brownish crust.  My fears melted as I later cut into them, the crust sinking down to reveal the glistening cherries, leaving just enough baked sugar on top to add a touch of bronze spackle (like a butter tart filled with fresh fruit!).  They were perfect for sharing (meaning they were easy to cut, store and transport - they were, admittedly, a little bit hard to part with).  I'll take Willow's suggestion and try peaches, plums and rhubarb, but really am looking forward to the next marasca season; I was pretty pleased with these cherries on top.

sour cherry bars


Saturday, May 14, 2011

Sad Apples

Last week I came down with a serious case of sad apples and, aware that the symptoms of shriveling skin and spreading soft spots would only increase if ignored, I needed a treatment - fast.  Unfortunately, two flats of applesauce are already stored in our basement (not exactly unfortunate; it is excellent applesauce, hence the two flats).  Wanting to avoid traditional medicine, I scoured the net for alternative therapy.  My attempt was in vain.  With approximately 3.14 usable apples, naturally the answer was pie.


sad apples


Let's just preface by saying (again, because I am certain I have said it before) that I am not a pastry chef.  I'll go one step farther and admit that my fear of insulting the crust goddesses in my life (and yes, I'm lucky to have a few) makes me shy away from the pie tin (unless it's full of pie, then I grab a fork). Like "look both ways before crossing the street" and "don't take what isn't yours", "pie crust isn't easy" is a rule that was deeply ingrained at an early age.  Alas, since this isn't a matter of life and death (except for the apples), and it isn't illegal (though maybe it should be), I'll use my best judgement and downgrade the rule to a guideline.  Besides, I'm old enough to know now that pie crust is actually pretty easy; it's good pie crust that eludes.

I found a lovely recipe at Food & Wine Magazine for a good sounding apple tart; ideal for people like me who don't actually own a pie tin (did I forget to mention?) The recipe seemed like it could be the cure, specifically calling for golden delicious apples (exactly what I had...when does that ever happen?) and, most importantly, was not for just any old apple tart; it was for RUSTIC apple tart.  Rustic I can do.

And you can too...


peeling apples


You'll need 4 golden delicious apples (though there are a zillion different types of apples that you could use instead, I'm sure).  Peel them (mine were so much happier once I got them out of their skins), halve them, core them and slice them (not paper thin, but not so chunky they'll never cook).  Compost your compostables if possible (yay garden!)


compostables


Now comes the hard part, which won't be so hard if you pay attention to the important parts.  The pie crust ingredients are, in fact, very simple:  1 1/2 cups of flour, a pinch of salt, 6 oz cold butter (for the love of pie, people, please use real butter) and 1/3 cup of ice water.  If I had a siren I would sound it now.  ICE WATER.

Here is the (sort of) science behind the secret of successful pastry.  As the fat (butter) increases in temperature, it releases its water content.  When flour gets wet, it develops protein strands (gluten).  While you do need a small amount of liquid to form the dough, too much wet will result in too much gluten.  Gluten is extremely elastic and makes your dough hard to roll, become stretched when you do, and shrink when it's baked.  All of this adds up to the reason why four out of five dentists¹ claim that gluten is the leading cause of tough pastry (and we've been trusting those dentists for years).   Please keep your fat from sweating; use ice water and chilled butter.

In the actual recipe, we are instructed to pulse the ingredients in a food processor for various lengths of time and intervals blah blah blah.  That didn't sound very rustic to me (and I don't own a food processer) so I substituted my hands and two knives (much easier to wash, if you ask me... which you didn't, but I'm just saying...) I mixed the flour and salt really well, then chopped the cold butter into small cubes (quickly so it didn't warm up) and cut it in to the salted flour until it resembled little peas (but not green).  The food processor people should be able to do this in about five seconds.  It took me about a minute. Next, I sprinkled my ice water (just the water, not the ice) over the pea-ish buttery salted flour and quickly mixed it with my fingertips (after holding a large block of ice to lower the body heat factor - true story) until it was just moistened, then turned it onto my lightly floured rolling board, gathered it all together into a ball and kneaded (kneaded?  kned?) it just a few times until I had a genuine solid mass of (still flaky) dough. 

Ideally (back to the science end of things) you would put this dough ball in the refrigerator for the night but, since my main concern was making sad apples happy and not making perfect pie crust, I sacrificed and kept on going.  Besides, who decides today that they'll feel like pie tomorrow?  If you are with me on team instant gratification, please continue.  If not, put your dough in the fridge, wash your food processor, and continue below tomorrow.


rolled dough


Okay.  On a lightly floured surface, roll the dough into a large amoeba shaped figure about 1/4 inch thick.  No, of course Food & Wine did not suggest an amoeba shape, but I'm hanging on hard to rustic (you are welcome to try it their way with a 16 - 17" round).  Regardless of what shape you choose (and it may not actually be a choice - sometimes you just get what you get), roll the whole flat around the rolling pin, then unroll it over a large, unrimmed baking pan that you've lined with parchment paper.  I know that those of you who have been following me for awhile will remember that my most reliable oven for baking does not allow room for anything large, so I just used the bottom of a 9" springform pan and proved another fine example of 'work with what you've got'.


sugar floured dough on parchment


Next, combine 2 tablespoons of flour with 1 teaspoon of sugar and sprinkle it over the dough. Arrange the sliced apples on top in an overlapping fashion.  Leave 3-ish inches of border that you will fold over them when you are done.  This will all rely on using your own judgement based on your pan choice and dough shape - but I promise, you can do it.  Rustic.


apples assembled


orderly fashion


Once your apples are all tucked in with dough edges all around, brush them (the apples) with 2 tablespoons of melted butter, then sprinkle with 1 1/2 tablespoons of sugar.  I also gave mine a few uncalled for shakes of cinnamon (I know, I'm such a rebel).  After patting yourself on the back with your floury hands, put the whole thing in the fridge to chill while you wait for your oven to heat to 400 F / 205 C. Pop that beauty in the oven and set your timer for an hour.


rustic apple tart


Since we've got an hour to kill, I'll tell you about the last time I baked rustic apple anything.  When I was about 12, we had an apple tree.  We also had a wood stove with an oven.  One day my best friend (The Other Hannah) and I decided it would be a lovely idea to bake homemade pie.  We picked all of the apples and lit a nice fire in the stove.  We didn't know anything about chilled butter or ice water back then, but we mixed and rolled and assembled and baked at whatever temperature the fire gave us. We were extremely proud of ourselves and the (big) trouble we found ourselves in for lighting the wood stove when nobody was home was well worth our efforts (sorry Mom and Dad).  It was truly the best. pie. ever.  That's rustic!  Note:  If you are reading this and happen to be at the age of 'don't light  fires without parental supervision' please do not attempt to try this at home.

Check on your pie.  When your crust is golden and your apples are tender, remove it from the oven and brush the apples with 2 tablespoons of melted apricot preserves.  If you don't have any apricot preserves, try pineapple.  If you don't have any of that, skip it.  I believe it only serves the purpose to make it shiny and beautiful (but perhaps I am wrong.. it happens).  Do NOT brush it with 2 tablespoons of melted berry preserves, which is all I had.  It won't ruin the taste, but it will look like you had a serious knife accident and bled all over your pretty tart. Anyway, brush it or don't, then slide the parchment paper (and pie) on to a wire rack (or four wide mouthed tea cups if you lack one like me) to let the tart cool slightly before serving.


tea time


That's it.  We're done!  Aside from the red preserves mishap, my apple tart was a hit.  The pastry was flaky and the filling was tasty.  My apples were happy.  Rustic works.  And pie IS the answer (to everything).


flaky pastry


¹No dentists were actually surveyed with regards to the properties of gluten for the purpose of this article.

Want to see more Sad Apples?  Feast your eyes at flickr.  Want to bake this?  Cut my babble and grab the recipe for Rustic Apple Tart from Food & Wine.  Please don't forget to share... Post your own photos and stories at The Perfect Avocado on Facebook.


Monday, May 24, 2010

When Life Gives You Lemons...

One of my favorite things about island life is the abundant supply of lemons and, with our own little tree in the garden, the availability of freshly squeezed juice just mere steps away.  As a long time lover of lemons (and generally all things tart), I've been using them wherever I possibly can.  Lemonade, cake, chicken, rice, bars, tea, fish... The list goes on, yet still I continue to search out new ways to cash in on our yellow bounty.

our little lemon tree

The other day a friend asked me if I had any good dessert recipes.  With my standard disclaimer that I am more cook than bake, I asked him what type of desserts he liked.  When he responded with liquid-ish items, including yogurt and vla, my interest peaked; these are the types of desserts that are right up my alley.  For those who don't know what vla is (don't worry, neither did I), it is a Dutch custard product that, to the best of my wiki knowledge, is similar to flan. This same friend, just moments before posing the dessert question, had recited a recipe for eggs that incorporated lemon juice.  I took a quick mental stock.  I knew he liked lemon.  I knew he ate eggs.  I knew he enjoyed the consistency of custards.  I knew exactly what to make.

bowl of lemons

Lemon curd (or spread) is one of those items I always find myself stopping to look at in the grocery store. I consider it and then put right back on the shelf.  Aside from the exaggerated price, I am generally disappointed with products containing prefabricated pie filling (blame my mom for spoiling me with homemade lemon meringue) and I am quick to assume that the fancy jelly aisle jars contain precisely that.  It looks good in theory, but I know better than to be tempted by pretty packaged promises.

juicer w/cut lemon

Fresh lemon curd is seriously as simple as zesting a couple of lemons, squeezing out the juice and mixing it with sugar, eggs, and butter.  I'm not going to go through the motions of telling you exactly how to make it, instead I will just cut to the chase and suggest that you use the recipe posted at joyofbaking.com; the results were simply to die for and I couldn't explain it any better myself.  Do yourself one better and bake her cream scones too.  You'll thank me (and Joy of Baking) for it later.

lemon curd

At first taste, I immediately announced that the spread was way too sweet.  Then I instantly changed my mind and deemed it far too tart.  My confused mouth sent mixed messages to my brain, and I took a good couple of minutes to battle it out in my mind; Sweet?  Tart!  Sweet!  Tart?   I argued with myself as I continued taking tastes.  Whatever it was, it was good, so we loaded our basket with scones and went out to the terrace to enjoy the luscious lemon curd in all of its full flavoured glory. 

lemon curd w/cream scones

Sweet...  Tart...  Sweet... Tart...  I honestly couldn't decide.  That's how I knew it was perfect.
.

Sunday, May 2, 2010

Believe the Hype

I know. For those of you who listened in on my conversation (not) about coconut, the suspense is killing you.  "Did she ever make that loaf?" you wonder anxiously, refreshing the page at a constant interval in anticipation of the real coconut post.  Ego aside, it's likely you're not; however, I do know that my sister is.  I think I've kept her hanging long enough.

As you may or may not know, this was my new loaf pan test drive.  I assembled all of the ingredients I needed to make bills Coconut Bread, which my sister had recommended from Baking Bites, and took out my shiny new orange pan.  Coconut + New Kitchen Gear = Excitement².

infamous loaf pan w/coconut bread ingredients

Let's forget about the adding and stirring, fast forward through the baking time, and cut to the chase.  After removing the beautifully baked bread from the oven and spending a solid six minutes carrying it through the house proclaiming it's excellency and inhaling the fresh baked aroma,  I turned it out onto the counter (across the backs of 3 small plates - I don't have a baking rack) and tried to forget about it while it cooled.

bills coconut bread

bills coconut bread

This bread (and my loaf pan) is definitely a keeper.  A nice golden crust surrounds a moist (but not soggy) loaf of luscious coconut heaven.  It is marvelous on its own, but would be incredible as a base for some spreads (perhaps curried shrimp?), divine with mulligatawny soup, and insane as the outsides of a grilled cream cheese and pineapple sandwich.  I kept generating ideas as I ate the loaf, slice by slice, which stayed fresh until finished three days later; I will be sure to try some of them next time.

basket of bills coconut bread

bills coconut bread

bills coconut bread, sliced

Because we don't have a toaster, but I was unwaveringly adamant to try, I placed a couple thick slices in the oven to enjoy with our tea on the terrace.  It took longer to toast than desired, so this was our only taste, but I can now properly attest to the fact that this coconut bread, served hot and crispy along with the recommended mandatory pat of butter, really is, in the words of my sister, "to die for."  Do believe the hype.

toasted coconut bread w/melting butter

Thanks to Bill Granger for developing, to Baking Bites for posting, and to my sister for recommending this recipe.  Pass it on...
.

Saturday, April 24, 2010

For When Next Time is Now

If your house is like my house, the most difficult part about baking anything with bananas is keeping bananas in the house long enough for them to become over ripe and perfect for baking.  It doesn't matter if we buy a bunch of four (two to eat plus two for baking) or six (four to eat plus two for baking) or eight... they are always gobbled up in their prime which results in an inevitable "oh well, next time."  If you are somehow able to manage keeping the banana munchers away from the bunch and 'next time' actually occurs, this scrumptious cake is a great way to celebrate the achievement.

Banana Streusel Cake

As a non-baker (who seems to be baking an awful lot lately), I always assemble and prepare all of the ingredients prior to mixing the wet and dry.  I am not entirely sure of the reason, but I think that somewhere deep in the back of my brain I actually learned this in Home Economics - something to do with the baking powder activation - anyway... whatever it was, it is something I just always do.  Please keep in mind that the only thing I really remember about Home Ec. is the time our entire class played indoor frizbee-tag with a massive stack of rubbery pancakes and making our teacher break down in a fit of frustration and cry (if you are reading this Ms. Walters - I'm sorry) so it might just be a self imagined baking "rule".  If you usually bake on the go, just ignore the assembly part and use your own method.  Again, I am not a baker.

First, I begin by coarsely chopping a 100g bar of milk chocolate into random sized bits.  You may choose to use chocolate chips or chunks or dark chocolate or white chocolate or no chocolate at all; whatever you prefer is right (yes, even nuts or raisins).  Set aside.

chopped chocolate

Next I cube 180g (3/4 cup) of softened butter.  I always remove the butter from the fridge the night before I need it, or first thing in the morning if I will be baking later in the day, which I suppose makes taking out your butter to soften the real first step in this whole banana cake baking process.  I find that cubing the butter makes it much easier to mix.  Place the butter in a bowl, along with 165g (2/3 cup) sugar and 150g (2/3 cup, packed) brown sugar.  Set aside.  In another bowl, combine 300g (2 cups) flour, 2 tsp baking powder and 1/2 tsp salt. Set aside.

To prepare the streusel topping, which makes this cake extra fabulous, combine an equal amount of sugar and flour (a couple of heaping soup spoons should do) in a small bowl and add a couple shakes of cinnamon.  Stir to blend, then add a tiny splash of water and a teaspoon-sized scoop of softened butter.  Use your hands to squish it together and then flail your fingers through it until it becomes a bowl of loose crumbles (you could also use two forks, but i find fingers more efficient).  Set aside.

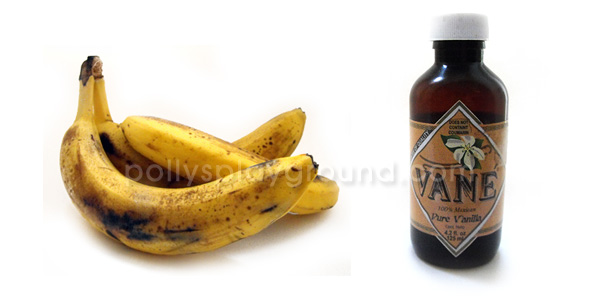
over ripe bananas | mexican vanilla

Finally, and most importantly, mash three (medium sized) over ripe bananas with the back of a fork.  Stir in one egg and one tsp vanilla.  Set aside.

prepared ingredients | streusel crumbs

Now that everything is assembled, it is time to mix the contents of your bowls together.  Cream the butter and sugars, then add the banana egg mixture and beat until well blended.  Gradually add your flour/baking powder/salt, continuing to mix thoroughly to a proper batter consistency, then fold the chocolate pieces in with a spoon.  Spread the batter into a greased 9x13" pan and cover with the streusel crumbs.  Bake at 175C (350F) for about 35 minutes - or until a toothpick inserted in to the center of the cake comes out clean.  Fill any holes left by toothpicks with random streusel crumbs and allow to cool completely before cutting (I know, it's hard, but so worth the extra wait). 

banana streusel cake

Your Banana Streusel Cake will be moist and dense, but not quite so much as a brownie, and the crispy crumbly topping contrasts the cake texture nicely.  This is exactly, in my opinion, what a coffee cake should be.  I've given up on ever trying to save bananas for the cause, but when I go to the store and find a bin full of over ripe bananas at a reduced price, I know that my "next time" has finally arrived.

banana streusel cake

Friday, March 12, 2010

I Am Not A Chocoholic


There are no emergency M&Ms inside my desk drawers, hidden Cadbury Bars in couch cushions or handfuls of Chipits snatched from the baking supplies. I'm not in love with heart shaped boxes, don't hop for bunnies and make only one trip to the store for Halloween mini-bars. I don't have fantasies of swimming hot fudge oceans or start shaking at the mention of dark, milk or white. I know plenty of people do; I am just not one of them. I am not a chocoholic.

While I'm rarely tempted by restaurant promises of 'Ecstasy' or 'Explosion' and completely unfazed by triple chunks and double dips, I do occasionally (say every 28 days or so) crave the fix. When the I-need-chocolate-and-I-need-it-now does suddenly hit, I am wise enough to know better than to attempt achieving satisfaction by any other means. Even those of us who aren't stricken by the addiction can understand the phenomena of eating everything within arms length before the inevitable midnight run to 7-11 for a piece of some chocolate action. Occasionally came for me yesterday; and so I decided to bake.

cocoa powder

A member at Recipezaar, my favorite online cooking community, had posted a recipe for "Whatever Floats Your Boat" Brownies, promising the chewiest, moistest, fudgiest brownies ever and, with 908 glowing reviews, I had little reason to doubt. I had the required ingredients and the method was simple; it even allowed for the addition of nuts, fruit, candy, marshmallows, or, as advertised, whatever would float my boat. I felt that hard or chunky textures would only weigh me down so, at the suggestion of one reviewer, incorporated a cheesecake swirl to secure my buoyancy.

I doubled the recipe (why fool around?), carefully converting the cups and pounds to weight in grams. I was short on cocoa powder but made up the difference by grating a bit of a baking bar until it turned to dust. Resisting temptation to mix the batter to smooth chocolate oblivion, I backed away from the bowl and poured the batter.

Everyone knows that baking is science. With my lab void of measuring vessels and my oven a mind of its own, I've certainly experienced my share of burnt edges and pans full of cake batter goo. I placed the pan in the oven with semi-high hopes, yet fully prepared to eat that sucker with a spoon if necessary.

Thirty-two minutes later I whisked my pan of hot salvation from the oven but worried they were still too wet. "Another 5 minutes," I thought, ready to return them for another round of heat. Step #9 haunted me though: DO NOT OVER-BAKE -- your brownies will come out dry. I put my trust in a sticky toothpick and refrained. When eternity had expired and my brownies cooled completely, I nervously pulled a tiny test piece from the corner. Then I cut a bigger one. Then I poured a glass of milk. Then I got a plate.

milk chocolate bliss


chewy fudgey chocolate brownie
These brownies are the epitome of everything chocolate and the remedy for the symptoms of an addiction I don't have. Any further description would instantly cast a shadow over my initial proclamation. I am not a chocoholic - but these could be my gateway drug.

tower of fudge