Sunday, November 20, 2011

Comfy Cabbage Rolls (Unrolled)

I'm a big fan of cabbage rolls.  I'm not a big fan of making cabbage rolls.  Okay, honestly?  I've never actually made cabbage rolls... (no, that wasn't me, that was Saša who made the sarma); just thinking about the process of individually stuffing cabbage leaves completely puts me off.  I prefer to practice a literal approach to comfort food; I seek comfort while the food cooks itself.

But I'm a big fan of cabbage rolls.  I needed to find a way to work this out.  And, without using any boyfriend bribery, I eventually did. Woot!

I'm going to tell you a secret.  You can get all of the flavour (and infinitely more comfort) of traditional cabbage rolls by using the same ingredients sans stuffing and rolling.  Yes, really.  Don't tell your amazing cabbage roll making friends and/or relatives because they'll never make the real deal for you again if they ever find this out.

This dish is embarrassingly simple to prepare (as in you need the cooking skills of a thumbtack) and requires very few ingredients (most of which you probably have on hand).  If you are longing for a lazy afternoon but still want to impress those around your dinner table (with flavour - not with presentation... because honestly it looks like a pile of slop) then grab your aprons and let's go...

You will need an average size head of green cabbage (or 2 small ones... or part of a massive one...), a couple of onions, about a pound of ground meat (I use mixed pork and beef), raw white rice, 2 x 500 g cartons of tomato sauce (that's roughly 3.5 cups for the imperialists - based not on mathematical conversions, but rather by pouring water in to my empty cartons to measure it just for you), honey, lemon juice, soy sauce, salt, pepper and garlic powder.  You will also need a large pot (my 5.5 litre is just large enough to make this) with a lid.

chopped onions

Once you have gathered your ingredients, heat a small amount of fat (butter, lard, oil... whatever makes you comfy) in your large pot over medium-low heat.  Chop up your onions and add them to the pot.  You don't want to fry or brown the onions, you just want to heat them until they are soft and infuse the fat with their flavour - adjust your burner temperature accordingly.  

softening the onions

While your onions are softening, cut your cabbage into large chunky pieces.  Loosely separate the cabbage leaves to break apart any too chunky chunks and give them a nice rinse under your kitchen tap to get rid of any residual yuck.
  
chunky cabbage

Add the cabbage to the pot, a few handfuls at a time, stirring to mix with the onions.  Don't freak out if you can't fit all the cabbage in to the pot right away as it will shrink while it heats and will create room for more.

green cabbage and onions

Once you have added the cabbage to the pot (or in between adding handfuls), combine 4 soup sized spoonfuls of honey with 60 ml (1/4 cup) of lemon juice.  I recommend squeezing two medium sized lemons because fresh is always best - but use what you've got.
  
juicing lemons

Mix the honey/lemon with 500 ml (2 cups) water (I did mine right in the honey jar because I only had about 4 spoonfuls of honey left in there).  Add the tomato sauce (1 kg or 750 ml-ish or 3.5 cups-ish...) and season with salt, pepper and garlic powder.  Your seasoning will depend entirely on your taste (and whether you used salted or seasoned tomato sauce) BUT... don't get too heavy with the shakers as you'll be adding some seasonings to your meat as well... and you can always add more later if needed.  You have been warned.

salt, pepper, tomato sauce, garlic powder and honey (with lemon juice and water)

Pour the sauce over the cabbage in the pot, increase the burner temperature and bring to a boil, stirring occasionally.  When the sauce begins to boil, cover the pot with a lid and simmer while you make the meatballs.  Don't worry if your sauce isn't covering all the cabbage - it will be eventually.  As your cabbage simmers away in the sauce, it's time to make the meatballs. 

tomato sauce poured over cabbage and onions
seasonings, ground meat, uncooked white rice

Combine your ground meat (excuse the brown bits in the photo - I left it to defrost in the microwave a few seconds too long) with 50g (1/4 cup) of UNCOOKED white rice, a splash of soy sauce (or worcestershire if you'd rather...), garlic powder, pepper and salt.  As with the tomato sauce, the seasoning level is left up to you.  Don't over mix or squeeze the meat, just gently toss the ingredients together until everything is combined.  Speaking of meatballs, I should probably mention that,unless you don't mind having a layer of fat floating on top of the pot as you get ready to serve your meal, using lean ground meat will be your best choice.

ground mixed meat with uncooked rice, soy sauce and seasonings

By the time you finish mixing your meat and carry it over to the stove, you will notice that your simmering cabbage is now nicely covered with sauce (see?  I told you it would happen!).  

simmering cabbage (now nicely covered with sauce)

Form the meat mixture in to small meatballs and drop them in to the pot on top of the cabbage.  When all the meatballs have been added to the pot, press them gently with the back of a spoon to cover them with sauce.  Bring the sauce back up to a gentle boil (if it isn't already), cover, reduce the heat and simmer for 2 hours. Two whole hours!!  That's ample time to get comfy.  You may now kick back and relax while your home fills with the cozy scent of comfortable.

meatballs and cabbage simmering in tomato sauce

As your meal makes away on the stovetop, do peek under the lid every so often to ensure that you are still at a simmer and to give it a gentle stir.  My 'stirring' involves sliding a large wooden spoon down the side of the pot and stirring along the bottom so that I don't disturb the meatballs.  Don't panic if (and when) your meatballs crumble... in the end you will have some random meaty bits throughout the sauce, but you will still have some nice big chunky lumps.  After two hours of simmer (or longer - that's okay too), call everyone to the table and enjoy your comfy cabbage not-rolls.  Serve with mashed potatoes and sour cream.

random meaty bits and big chunky lumps

As promised, this dish is the epitome of comfort food and is sure to please the masses.  I assume it will freeze well (we just eat it for three days straight... and it gets better and better each day).  I did already tell you that this meal isn't pretty... but that's comfort food.  You probably don't look your finest when you're donning decade old sweatshirts, flannel pajama bottoms and mismatched wool socks... but the way you feel when you're wearing them best explains my point.

comfy cabbage rolls (unrolled), mashed potatoes and sour cream

Seriously Curious:  What's your all-time, absolute favourite comfort food and what makes it so deliciously comforting?  Shoot me a short comment below or answer my question @ The Perfect Avocado on Facebook.  I really want to know!

.

Wednesday, May 25, 2011

Chicken of Circumstance

Sometimes I'm completely backwards with my meal planning method. Instead of taking meat from the freezer and finding something to accompany it, I will decide I'm in the mood for, say, pineapple, and then work out a meal to incorporate it. Such was the situation a few days ago when I found myself at the market, blindsided by a basket of beautiful beans.

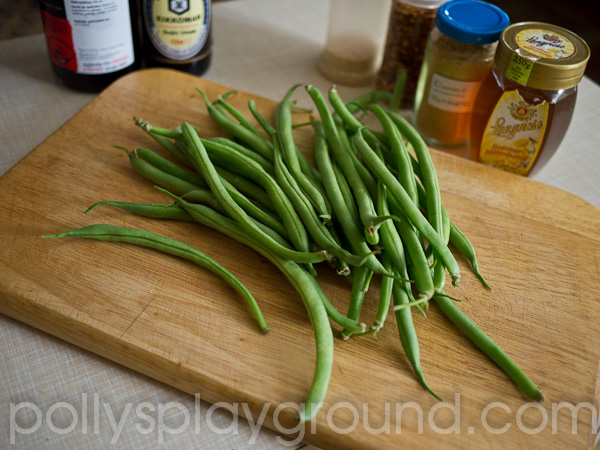
green and gorgeous

But this is not about the beans. Their duty is done. They sat in wait in their raw wooden crate being all green and gorgeous until I just had to have them.  They were the bait that lead to the switch in the story of meal planning backwards.

Bag in hand, knowing that I couldn't just serve up a plate full of green beans for dinner (though, I actually could - and would be perfectly happy with it), it was now my job to drum up the rest of the meal.  I began by banging my green bean repertoire around in my brain - sauteed? steamed? side dish? stir fry? lemon? garlic? almond? sesame? SESAME! oh-yes-a-me.  And the rest came tumbling after.

This simple sesame chicken, victim of my vegetable circumstance, is a delightful dish that can be made in the same amount of time it takes to cook some rice and steam some beans (and half the time it takes to read this article). If you don't require an obscene amount of meat, it can also be quite economical.  One half of a large boneless, skinless chicken breast feeds the two of us.  If you are a raging carnivore, or are feeding a family of more, feel free to double, triple or mass produce. It will all work out fine (and leftovers are always nice too).

beans on board

First, rinse your breast (the chicken.. the CHICKEN!) and pat dry with a paper towel  Here we could insert an entire conversation about whether we should or shouldn't rinse our chicken prior to cooking - but, since it's my blog, and I do, that's the first step. I guess some may argue that the probability of cross contamination increases if you rinse due to water splashing on to items within close proximity, but I'm not recreating a scene reminiscent of Flashdance here, I'm simply running a single breast under a slow flowing tap, wrapping it in a double paper towel and placing it on my glass board - sans splash - zero drips.  What more can I say? I like my breasts bathed and swaddled before they hit the pan.  Anyway... do rinse or don't rinse, then, if your breasts are thick like mine (stop now), slice through horizontally to make two pieces of equal thickness, then cut into a-bit-smaller-than-bite-size cubes.

one half boneless, skinless chicken breast...

Now, I'm fairly confident that most of you (aside from, perhaps, the raging carnivores) will share my opinion that raw meat is generally not an attractive subject matter for photographs; but, after a recent conversation in which a friend could not grasp, through my words, the concept of horizontal slicing (forgive her, English is not her first language), I have reluctantly decided to illustrate. Please bear with me. Cooking isn't always pretty.  Besides, all this talk about breasts and photos of naked chicks should get me a few extra hits on my blog; my Naked Noodles post is extremely popular, and not because Googlers are searching for plain ol' spaghetti (sorry to disappoint, folks).


... horizontally sliced becomes two...

...and then cubed.

Ok, back to the task at hand.  Sauté a handful of diced onion and a couple cloves of chopped garlic in a small amount of oil (I use olive - and just enough to coat the bottom of the pan and to carry the flavours).  When the onion is soft, add the cubed chicken and allow to cook through until no longer pink.

sesame seeds, dried chili pepper flakes, honey, sesame oil, soy sauce

While the chicken, garlic and onions are happily cooking on the stove, make your sauce.  In a small bowl or cup, stir together a large spoonful of honey, an equal amount of soy sauce, a touch of sesame oil (depending on your taste because it is powerful stuff... I probably used about 1/4 tsp) and 75mL (ish) of water.  Add 1/4 tsp powdered ginger (unless you are lucky enough to have fresh) and 1 tsp cornstarch; whisk until smooth then finish with a dash or two of dried chili pepper flakes (according to taste).  Remember that this is enough sauce for one half chicken breast - increase the amounts if you'll be using more.

When the chicken is cooked through, add the sauce to the pan and stir until it becomes slightly thickened (add a bit more water if the sauce is too thick).  Stir in a small spooful of toasted sesame seeds; cover and simmer for about ten minutes (or until your rice and green beans are done).

Assemble.  Serve.  Love.

sesame chicken w/ green beans and rice

I generally lack imagination and enthusiasm when my starting point is meat.  Backwards works best for me. Instead of torturing myself with "what should I do with this chicken?" while pacing from cupboard to cupboard with occasional stops at the fridge, I'll take a trip to the market (or garden!), allow myself to be swayed by a seasonally spectacular vegetable and become inspired to create a meal. 


Seriously Curious:  Do you rinse your chicken before cooking, or is it just me?!  Shoot me a short comment below, or visit The Perfect Avocado on Facebook to tell me why you do (or don't).  I've really got to know!
.

Sunday, May 9, 2010

Braised Blackberry Pork

On our last trip to the "big" market, we bought a large jar of blackberries and, while I typically find the preserving liquid too sweet or the fruit too mushy in factory processed canned fruit, I was extremely impressed with both the quality and the flavour. These whole, firm berries, preserved in their own juice without added sweeteners were a surprise find indeed.

After eating most of the berries with yogurt, the jar still remained half full of juice. Sloshing it down the sink seemed such a waste so I challenged myself to find something to do with it. After spending some time searching recipes online, I became inspired by a mishmash of possibilities and created a pretty incredible dish. So incredible, in fact, that I made it two days in a row.

Braised Pork Rolls with Blackberry Gravy

To begin, brew a half cup of strong black tea.  Unlike the wine in last month's Drunken Applesauce, this tea is all for the recipe so, if you would like a cup to drink, be sure to brew more.  Once your tea is steeped, remove the tea bag or tea leaves and add one half of a vegetable or chicken bouillon cube.  Add one cup of blackberry juice and two tablespoons of balsamic vinegar.  Stir and set this aside.

Next, finely dice one small onion (reserving half of it for later), a bit of celery and some fresh parsley; sauté in a small amount of butter until the onions are soft.  Remove from heat and stir in some salt, pepper and poultry seasoning (I use Vegeta but I know this is not possible for everyone so the former will suffice).  Toss in a good handful of torn up day old bread and stir to mix well.  If the mixture seems a bit dry you can add a touch of water (or some of the juice as prepared above) but avoid making it too wet as it will end up very soggy after cooking.  Making this two days in a row, mine was too moist on day one; I opted for more butter and no liquid on day two and it was perfect.

torn bread, diced onions, celery, parsley

Now take your boneless pork chops and pound them to make them fairly flat and thin.  I just used two random pork chops and deboned them before hammering; they didn't look so pretty and were irregular in shape, but it didn't matter in the end.  Divide your bread mixture to cover both flattened chops, then roll them up, tucking in the edges to make sure the stuffing stays inside.  If your chops are very fatty around the edges they will curl some while they cook which might make them come a bit undone; you can tie them up with strings, but I don't like to mess with them afterward so I just don't bother.  Once your little rolls are tightly packed and well formed, dredge them in flour and set aside.

flattened pork chops with stuffing

dredging stuffed pork rolls

In the same saucepan that you used to make the stuffing mix, sauté the reserved half of the onion plus a teaspoon of thyme (I used dried - if you have fresh, adjust accordingly) in a small amount of fat (I used pork lard) - just enough to keep the onions and thyme from burning.  Add your pork rolls and lightly brown on all sides; leave them seam side down and then add 1/3 of the the tea/juice mixture you have prepared.  Stir around the pork to mix the juice with the onions, bring to a gentle boil, cover, reduce the heat to low and simmer for an hour.

browning pork rolls with onions and thyme

stuffed pork ready to simmer

Once you put the lid on the pan, you have time to clean up your mess, peel potatoes and put them on to boil, fix your salad or prepare your vegetables.  Every 15 minutes(ish) stir the sauce, lifting the pork to scrape any stuck bits off the bottom of the pan.  Add a tiny bit more of your reserved juice to the pan, drizzling over the pork and bringing the sauce back up to a boil each time before replacing the lid.

After an hour, remove the pork from the pan, place on a plate and cover with the lid to keep warm.  Mix a tablespoon or two of flour (I just used the rest from the dredging) with an equal amount of the reserved juice and mix well.  Slowly add your floury juice to the sauce in the pan, whisking constantly, to make the gravy.  Add the remaining tea/juice and continue to stir, allowing it to boil for about five minutes to reduce and thicken (and cook away any raw pork 'ick' if you used the dredging flour like I did).  Remove from heat, stir in a few whole berries, return the pork to the pan and serve  (alternatively you could arrange on plates or place in a proper serving dish - we aren't always so civilized).

braised pork rolls w/blackberry gravy | horseradish mashed potatoes

This very simple stove top meal will be on your table in just over an hour and the simmering time, which allows for full kitchen cleanup plus meal accompaniment preparation, is actually a time saving bonus.  An easy way to make your everyday pork chop extraordinary, giving you plenty of time to relax and enjoy these individual tender braised pork rolls packed with fresh stuffing smothered in rich burgundy blackberry gravy.

stuffed rolled pork w/ blackberry gravy | horseradish mashed potatoes

Thursday, April 22, 2010

A Conversation (not) About Coconut

Some time ago my sister and I were having one of our lengthy reply/send email sessions (I really don't know why we don't use instant messaging...) which began with the topic of coconut.  During our exchange, she sent along a recipe for Coconut Bread and claimed that, toasted and drizzled with butter, it was simply to die for.  I was immediately sold on the idea, but sadly informed her that I don't own a loaf pan.  She suggested altering the recipe to make it a cake instead; a good idea, but the selling point for me was "toast" and "butter" which is hardly cake appropriate.

Fast forward to last Sunday when I happened upon a loaf pan at the local Euro-Store (like a Dollar Store, but not, because everything is regular priced - at well over one Euro).  Regardless of the cost, I couldn't stop thinking about the Coconut Bread; certainly it would be worth it.  I hurried home to send a celebratory email to my sister (who now worries that the goods won't live up to the hype) letting her know I was finally able to try.  I postscripted by adding my bonus excitement of finally being able to serve a good meatloaf.

"Speaking of meatloaf" she says, "I have this great recipe for Meatloaf Muffins that you should definitely try."  Oh!  Yes!  Err... I don't have a muffin tin.  She sent me the Meatloaf Muffin recipe anyway, with all of her notes, mentioning that a baking tray (I didn't even bother to tell her) would probably work out just fine.  Besides, I had a loaf pan now.  I could just make a proper meat loaf.

Saša and I spent a good portion of yesterday discussing dinner in that "I really don't feel like going to the store so whatever we decide needs to be made from what we have on hand" kind of way.  My mind was stuck on meatloaf and we had everything we'd need (or close enough, at least).  I naturally pushed the conversation in that direction until our rapidly increasing hunger plus far too long cooking time stacked the odds against me and nullified my plan.  My brain (or stomach) devised 'Plan B' and remembered my sister's muffins.  I rechecked my email and printed the recipe.  No muffin tin. No baking tray. I would figure it out.

glazed meatballs ready for the oven

I had not planned to blog about these little muffins (now meatballs), so I cannot share the process through pictures prior to the "just about to put them in the oven" point (above).  Instead I will provide the actual recipe, along with my sister's notes (and mine) for making these meat-loaf/muffin/balls which, of course, will depend on your receptacle of choice or availability. 


Meatloaf Muffins
2 lbs. ground beef (I've used 1lb and halved some of the other ingredients, I've also used ground turkey a lot too) (I used mixed ground beef and pork - a little short of 1 lb)
1/2 small yellow onion (I diced my onion and then completely forgot to add it to the meat mixture - it ended up as part of the side dish)
1 stalk of celery (I don't like green bits in my meat - omitted)
1 cup bread crumbs
(I don't really measure but I am sure I use less) (I hammered - yes hammered - 4 small pieces of dry bread, that we normally save to mix with the cat's food, into course crumbs.  Cat got scared from the hammering and probably wasn't happy that I pilfered her bread either.)
1 egg
1 tbsp Montreal Steak Spice
(Don't have any - so I use a few shakes each of lemon pepper, cayenne, crushed red pepper flakes and dry mustard) (Also didn't have any.  I used pepper, hot paprika, sweet paprika, vegeta, garlic powder, chili powder, dry mustard)
1 cup of BBQ sauce
(probably more like 1/3 cup in the mix and 1/3 cup for the glaze) (I didn't have any *sigh* - used some tasty spiced ketchup instead)
Worcestershire (a few dashes)
(I am generous in both the mix and the glaze) (Again, *SIGH*... did I even really make this recipe?  I used soy sauce and red wine - very tasty)
1/2 tsp Dry Mustard
Salt and Pepper

Combine in bowl the meat
, egg, bread crumbs, BBQ sauce, spices and Worcestershire sauce. Dice celery and onion very finely then add to meat mixture. Season with salt and pepper.

Divide mixture into 12
(I make 6 larger ones since I usually use closer to 1lb of meat) balls and place in lightly greased muffin/cupcake tray. (I made 6 large ones and placed them in a lightly greased casserole dish - shown in the photo above)

Combine remaining BBQ sauce with Worcestershire and dry mustard. Generously brush sauce on to the tops of each mini meatloaf.

Place in oven preheated to 450F and bake for 18
(I bake them for closer to 28) minutes. (I baked at a temperature which can only be described as 'on' for about 30 minutes).


If you are like me, your favorite part about meatloaf is how the edges cook to a well-done crust, sealing in the juices to keep the meat moist and full of flavour.  In forming these loaves into smaller shapes,  you end up with much more surface area.  This means more crust.  It also means more glaze.  In less than half the cooking time, these tasty balls of yum ended up being better than the loaf I had originally longed for.

meatloaf muffin adaptation

So this is what came out of the conversation about coconut.  And I still haven't used my loaf pan; I forgot that I don't own a toaster.

glazed meatballs, mashed potatoes, creamy corn

Tuesday, April 6, 2010

Toast

As much as technology allows me to stay connected with family and feel close to home, there are certain moments when I am reminded of the distance between. 

My best friend got married last week and, after sharing more than twenty five years worth of monumental moments, I was suddenly stuck on the other side of the world.  Refusing to let thousands of kilometers keep me from celebrating such an important occasion, yet believing that there would likely be no sudden advances in teleportation technology (or, if there were, I would hardly be one to afford such a luxury), I took matters into my own hands and began to entertain alternative methods which would allow me to participate without being physically present.

My dear friend, the bride, is an incredibly skilled chef, a lover of all things food and a faithful follower of my blog, so an edible offering to honour their union seemed like a suitable salute.  I ran through a quick collection of ideas in my head, crossing each of them off before they could even be counted.  A wedding cake could never be trusted to my oven.  Rice would be nice, though a little bland on its own.  Perhaps a bubbly cocktail?  No, she's food, not drink.  Should I just make toast? After Googling my way around for some time, hoping for inspiration but finding everything but, I locked my laptop and took a break on the terrace, faithful that a flash notion would come.  As the church bells chimed, clarity came; I would prepare a taste of Croatia.

The dish was finally settled upon with the help of my lovely friend, Katica.  "I am desperately seeking typical Croatian wedding fare?" I queried via email (also relaying my purpose to avoid the obvious confusion it might have caused).   Soon she arrived at my door, recipe clippings in hand, to discuss the procedure and the prominence, insisting that "there is no family with self-respect in whole Croatia, from border to border, who would have traditional wedding table without sarma."

sour cabbage, minced meat, herbs, spices, onions

Saša would prepare the meal while I followed along with the camera, and so armed with minced meats, onions and a full sour cabbage, we assumed our kitchen positions.  Sun rays danced through the window and together we noticed how the tall stack of cabbage leaves was magically transformed into a delicate tower of bridalesque petals and, although Dalmatian sarma (arambašići) does not include rice, we decided to throw some in anyway (it was, after all, a wedding).  After mixing and rolling (and a quick call to Aunt Vera to confirm that everything was just right) we tucked the last piece into the pot and simmered our marriage feast.

sarma assembly

pot full of sarma

placing pork rinds

adding tomato roux

Later that evening we dined on the terrace sending well wishes across the water and, after several savoury scoops of the smokey-sour sarma and mouthfuls of mashed potatoes, sat as stuffed as the cabbage we'd eaten.  And then feeling blissfully full, not only from food, but of happiness, we raised our glasses to Hannah and Pete, thankful we could share in their day...

 "To Hannah and Pete, who both bring their own individually unique ingredients, and a perfect blend of spice, to create the ultimate recipe.  May together your flavour forever continue to develop; becoming more delicious with each passing day."

sarma dish

sarma

...with much love.

Monday, March 29, 2010

Outside the Box

Any true Canadian knows that the only real way to make mac 'n' cheese involves a "remove pouch from box" step and that it is served either one of two ways; with or without ketchup.  It is our babysitters' saviour, our hockey moms' helper and every college's dorm room norm.  No, it is not the same as your Kraft Macaroni & Cheese or your Cheesey Pasta; to do it right it's 'Gotta Be KD'.

Kraft Dinner is as much a part of Cananda as beavers and hockey and mounties and no other nation is as nearly devoted to those straight skinny noodles in the bright orange milky sauce.  From coast to coast, for 99 cents, we purchase almost 80 million cobalt blue cartons each year, but affordability aside, we eat it just because we love it.  In the words of canuck rock spectacle, Barenaked Ladies, if we had $1,000,000 we'd just eat more (and buy really expensive ketchup with it).

While Kraft Dinner is undeniably amazing, there are points in our lives when we might choose to venture outside of the box (or, as in my case, lack of product availability dictates the choice).  Over the years I have tried a slew of " scratch" recipes, from various sources, admittedly without much success; from gloppy cheese to dry and bland, they always fall short on their promise.  With grocery day looming (which means pasta at our house) and a craving for comfort food, I decided to eliminate the middle man and take a stab at concocting my own.

Before we embark on today's kitchen adventure, let's clear up any misconceptions that this will be a Kraft Dinner replacement or any sort of attempt at traditional macaroni and cheese.  There is no gooey orange goodness or smooth creamy sauce (actually, there's not even any macaroni); but it is astonishingly delicious in it's own right. 


Garlic Cream Cheese Penne

white pepper, milk, cream cheese, minced garlic

In a small pot, melt a soup spoon's worth of butter over medium heat, taking care to not let it burn or brown, then add 4 large cloves of garlic, minced, (or more or less depending on your garlic flavour preference) and stir until softened.  Reduce heat to low, whisk in about 150g cream cheese and, once the cheese is melted, stir in about 200mL of milk, a little bit at a time, until your mixture is well blended and smooth.  Season with a dash or two of white pepper, a sprinkle of nutmeg, and any other herbs or spices you might enjoy (I use Vegeta).  Don't panic; it will be very liquid-y but will soon reduce and thicken.

penne pasta

As you are preparing the sauce, have a large pot of lightly salted water boiling on the stove.  Begin to cook about 400g of pasta at the same time you start to stir the milk into your sauce; your timing should be perfect.  I used penne for two reasons; i love how the sauce fills up the insides of the tubes and i only had that or spaghetti available (if you've been following this blog, you know that we've already had spaghetti this week). 

garlic cream cheese sauce

Meanwhile, back at the sauce, once it has thickened to a point of holding well to a spoon remove it from the heat source and stir in a couple spoonfuls of fresh parmesan cheese. When your penne is cooked to al dante, drain well and return it to the pot.  Pour the sauce over the pasta and stir to coat evenly.  Divide into bowls, top each with a bit of fresh ground pepper, avoid the use of ketchup and enjoy.

garlic cream cheese penne


Tuesday, March 23, 2010

(Almost) Naked Noodles

Growing up, I couldn't fathom why friends would forgo slumber parties for their dad's deep dish lasagna, I didn't understand perpetual arguments over whose grandmother made better sauce and I felt utterly betrayed by my sister when she chose The Old Spaghetti Factory (every time!) on family trips for dinner.  It's not that I didn't like pasta; it's just that I could easily deliver a list longer than linguine of many more mouthwatering meals.   

spaghetti in waiting

Noodles, to me, equalled nothing; yet I loved when my mom would make them.  On those days it seemed as our house had been transformed into a real-life Play-Doh pasta plant.  Floury rounds were fed through smooth, shiny rollers and squished into pancake-ish form; perfect scarves of pasta then carried from the kitchen and draped over every chair to wait for their noodle evolution.  With a crank of the handle, golden strands of fresh fettuccine were magically extruded by the pound, then returned to their rows where they'd dangle to dry like a doughy dining room car wash.  It was impossible not to touch.  And they smelled good.

photos (and pasta) courtesy of my mom
Today, instead of the backs of her chairs, Mom has a nice wooden hanger and I've grown up to fully enjoy a good plate.  When she forwarded the photos I requested for this story (thank you Mom), she mentioned making a modified alfredo sauce rather than the usual meat/tomato to avoid covering the pasta taste with such a dominant flavour.  This brings up the reason I passed on pasta as a kid; I like my noodles naked.

Spaghetti Carbonara

pancetta, garlic, onions

Cover the bottom of a sauté pan (to about 1 cm depth) with the absolute best quality extra virgin olive oil you can afford, heating over medium heat, until an onion piece added will sizzle.  Add one large diced onion, 2 or 4 minced garlic cloves, and two handfuls of chopped pancetta.  Simmer for about 20 minutes, stirring constantly.  Keep an eye on the heat, reducing to low if necessary; you do not want the oil to boil or smoke - but you want your stuff to cook.


olive oil simmer

After 20 minutes of simmer, add a sprinkle of crushed red peppers.  As much as I love heat; here less is more - don't get carried away as those who wish can add more later.  Continue to simmer and stir, now adding one package (500g) of spaghetti noodles to a large pot of (already) boiling salted water you have on the stove.

eggs, salt, pepper

In a small cup, whisk 2 eggs with a little salt and a lot of fresh ground pepper.  When the spaghetti is cooked al dente, quickly drain and return to the pot (keeping the noodles as hot as possible is a must).  Add the eggs and stir madly; the heat of the noodles will cook the eggs and the stirring will distribute them evenly (as shown in photo below).  When you are certain the eggs are done, add your olive oil/onion/garlic/pancetta mixture and stir well again.  Place spaghetti in bowls and top with a generous spoonful of fresh grated parmesan cheese.

eggs cooked by noodles

Don't be fooled by the nudity; the beauty of this dish comes through it's simplicity.  Simmering the onion, garlic, pancetta and peppers for a good length of time allows for the flavours to fully develop and you can taste each ingredient (including the noodles) without any overpowering the others.

spaghetti carbonara

While easily adaptable to accommodate more, the amounts here are perfect for two.  With no rush in the kitchen and no mess to clean up, pour some wine and prepare this for your partner.  It takes less than an hour to put on the table (leaving more time for naked beyond noodles).

Learn more about Spaghetti Carbonara @ Wikipedia
Learn more about heating olive oil @ The Olive Oil Source