Wednesday, May 25, 2011

Chicken of Circumstance

Sometimes I'm completely backwards with my meal planning method. Instead of taking meat from the freezer and finding something to accompany it, I will decide I'm in the mood for, say, pineapple, and then work out a meal to incorporate it. Such was the situation a few days ago when I found myself at the market, blindsided by a basket of beautiful beans.

green and gorgeous

But this is not about the beans. Their duty is done. They sat in wait in their raw wooden crate being all green and gorgeous until I just had to have them.  They were the bait that lead to the switch in the story of meal planning backwards.

Bag in hand, knowing that I couldn't just serve up a plate full of green beans for dinner (though, I actually could - and would be perfectly happy with it), it was now my job to drum up the rest of the meal.  I began by banging my green bean repertoire around in my brain - sauteed? steamed? side dish? stir fry? lemon? garlic? almond? sesame? SESAME! oh-yes-a-me.  And the rest came tumbling after.

This simple sesame chicken, victim of my vegetable circumstance, is a delightful dish that can be made in the same amount of time it takes to cook some rice and steam some beans (and half the time it takes to read this article). If you don't require an obscene amount of meat, it can also be quite economical.  One half of a large boneless, skinless chicken breast feeds the two of us.  If you are a raging carnivore, or are feeding a family of more, feel free to double, triple or mass produce. It will all work out fine (and leftovers are always nice too).
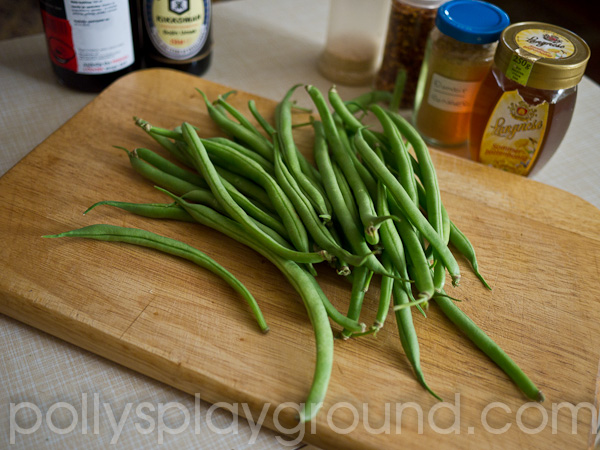
beans on board

First, rinse your breast (the chicken.. the CHICKEN!) and pat dry with a paper towel  Here we could insert an entire conversation about whether we should or shouldn't rinse our chicken prior to cooking - but, since it's my blog, and I do, that's the first step. I guess some may argue that the probability of cross contamination increases if you rinse due to water splashing on to items within close proximity, but I'm not recreating a scene reminiscent of Flashdance here, I'm simply running a single breast under a slow flowing tap, wrapping it in a double paper towel and placing it on my glass board - sans splash - zero drips.  What more can I say? I like my breasts bathed and swaddled before they hit the pan.  Anyway... do rinse or don't rinse, then, if your breasts are thick like mine (stop now), slice through horizontally to make two pieces of equal thickness, then cut into a-bit-smaller-than-bite-size cubes.

one half boneless, skinless chicken breast...

Now, I'm fairly confident that most of you (aside from, perhaps, the raging carnivores) will share my opinion that raw meat is generally not an attractive subject matter for photographs; but, after a recent conversation in which a friend could not grasp, through my words, the concept of horizontal slicing (forgive her, English is not her first language), I have reluctantly decided to illustrate. Please bear with me. Cooking isn't always pretty.  Besides, all this talk about breasts and photos of naked chicks should get me a few extra hits on my blog; my Naked Noodles post is extremely popular, and not because Googlers are searching for plain ol' spaghetti (sorry to disappoint, folks).


... horizontally sliced becomes two...

...and then cubed.

Ok, back to the task at hand.  Sauté a handful of diced onion and a couple cloves of chopped garlic in a small amount of oil (I use olive - and just enough to coat the bottom of the pan and to carry the flavours).  When the onion is soft, add the cubed chicken and allow to cook through until no longer pink.

sesame seeds, dried chili pepper flakes, honey, sesame oil, soy sauce

While the chicken, garlic and onions are happily cooking on the stove, make your sauce.  In a small bowl or cup, stir together a large spoonful of honey, an equal amount of soy sauce, a touch of sesame oil (depending on your taste because it is powerful stuff... I probably used about 1/4 tsp) and 75mL (ish) of water.  Add 1/4 tsp powdered ginger (unless you are lucky enough to have fresh) and 1 tsp cornstarch; whisk until smooth then finish with a dash or two of dried chili pepper flakes (according to taste).  Remember that this is enough sauce for one half chicken breast - increase the amounts if you'll be using more.

When the chicken is cooked through, add the sauce to the pan and stir until it becomes slightly thickened (add a bit more water if the sauce is too thick).  Stir in a small spooful of toasted sesame seeds; cover and simmer for about ten minutes (or until your rice and green beans are done).

Assemble.  Serve.  Love.

sesame chicken w/ green beans and rice

I generally lack imagination and enthusiasm when my starting point is meat.  Backwards works best for me. Instead of torturing myself with "what should I do with this chicken?" while pacing from cupboard to cupboard with occasional stops at the fridge, I'll take a trip to the market (or garden!), allow myself to be swayed by a seasonally spectacular vegetable and become inspired to create a meal. 


Seriously Curious:  Do you rinse your chicken before cooking, or is it just me?!  Shoot me a short comment below, or visit The Perfect Avocado on Facebook to tell me why you do (or don't).  I've really got to know!
.

Wednesday, May 18, 2011

Dear Eaters...

The other day I received a call from a friend who had invited us for dinner asking if we prefer chicken or fish.  After refusing my response of "whatever you wish to serve", she insisted that, in taking the time to ask, I should understand why it is so important for her to know.  She wanted to avoid any awkward moments at the table and to ensure that our meal together was enjoyable enough that we would look forward to coming again.

I feel the same way.  Here at The Perfect Avocado, it is important to me that each of you sit down for a good read and to enjoy every bite on the plate.  While it is easy to accommodate two people for dinner with a choice of chicken or fish, I know that I can't please everyone's taste for operating systems, displays, devices and browsers.  I try to keep my blog basic so everyone can eat.


Today I am excited to roll out the redesign for The Perfect Avocado and, while I didn't take the time to ask you prior to now, I do depend on all of you to provide feedback.  Please help me make you feel at home around the table; let me know if something is funky, wonky, broken or ugly on your side (especially the mac people because iDon't have iAnything to test it on).

I want to thank you all, again, for your messages while I was away and hope you all agree that the wait was worth it.  Welcome back to The Perfect Avocado with a brand new look (but the same great taste).  By the way, I chose the chicken.

Dobar tek!
.

Saturday, May 14, 2011

Sad Apples

Last week I came down with a serious case of sad apples and, aware that the symptoms of shriveling skin and spreading soft spots would only increase if ignored, I needed a treatment - fast.  Unfortunately, two flats of applesauce are already stored in our basement (not exactly unfortunate; it is excellent applesauce, hence the two flats).  Wanting to avoid traditional medicine, I scoured the net for alternative therapy.  My attempt was in vain.  With approximately 3.14 usable apples, naturally the answer was pie.


sad apples


Let's just preface by saying (again, because I am certain I have said it before) that I am not a pastry chef.  I'll go one step farther and admit that my fear of insulting the crust goddesses in my life (and yes, I'm lucky to have a few) makes me shy away from the pie tin (unless it's full of pie, then I grab a fork). Like "look both ways before crossing the street" and "don't take what isn't yours", "pie crust isn't easy" is a rule that was deeply ingrained at an early age.  Alas, since this isn't a matter of life and death (except for the apples), and it isn't illegal (though maybe it should be), I'll use my best judgement and downgrade the rule to a guideline.  Besides, I'm old enough to know now that pie crust is actually pretty easy; it's good pie crust that eludes.

I found a lovely recipe at Food & Wine Magazine for a good sounding apple tart; ideal for people like me who don't actually own a pie tin (did I forget to mention?) The recipe seemed like it could be the cure, specifically calling for golden delicious apples (exactly what I had...when does that ever happen?) and, most importantly, was not for just any old apple tart; it was for RUSTIC apple tart.  Rustic I can do.

And you can too...


peeling apples


You'll need 4 golden delicious apples (though there are a zillion different types of apples that you could use instead, I'm sure).  Peel them (mine were so much happier once I got them out of their skins), halve them, core them and slice them (not paper thin, but not so chunky they'll never cook).  Compost your compostables if possible (yay garden!)


compostables


Now comes the hard part, which won't be so hard if you pay attention to the important parts.  The pie crust ingredients are, in fact, very simple:  1 1/2 cups of flour, a pinch of salt, 6 oz cold butter (for the love of pie, people, please use real butter) and 1/3 cup of ice water.  If I had a siren I would sound it now.  ICE WATER.

Here is the (sort of) science behind the secret of successful pastry.  As the fat (butter) increases in temperature, it releases its water content.  When flour gets wet, it develops protein strands (gluten).  While you do need a small amount of liquid to form the dough, too much wet will result in too much gluten.  Gluten is extremely elastic and makes your dough hard to roll, become stretched when you do, and shrink when it's baked.  All of this adds up to the reason why four out of five dentists¹ claim that gluten is the leading cause of tough pastry (and we've been trusting those dentists for years).   Please keep your fat from sweating; use ice water and chilled butter.

In the actual recipe, we are instructed to pulse the ingredients in a food processor for various lengths of time and intervals blah blah blah.  That didn't sound very rustic to me (and I don't own a food processer) so I substituted my hands and two knives (much easier to wash, if you ask me... which you didn't, but I'm just saying...) I mixed the flour and salt really well, then chopped the cold butter into small cubes (quickly so it didn't warm up) and cut it in to the salted flour until it resembled little peas (but not green).  The food processor people should be able to do this in about five seconds.  It took me about a minute. Next, I sprinkled my ice water (just the water, not the ice) over the pea-ish buttery salted flour and quickly mixed it with my fingertips (after holding a large block of ice to lower the body heat factor - true story) until it was just moistened, then turned it onto my lightly floured rolling board, gathered it all together into a ball and kneaded (kneaded?  kned?) it just a few times until I had a genuine solid mass of (still flaky) dough. 

Ideally (back to the science end of things) you would put this dough ball in the refrigerator for the night but, since my main concern was making sad apples happy and not making perfect pie crust, I sacrificed and kept on going.  Besides, who decides today that they'll feel like pie tomorrow?  If you are with me on team instant gratification, please continue.  If not, put your dough in the fridge, wash your food processor, and continue below tomorrow.


rolled dough


Okay.  On a lightly floured surface, roll the dough into a large amoeba shaped figure about 1/4 inch thick.  No, of course Food & Wine did not suggest an amoeba shape, but I'm hanging on hard to rustic (you are welcome to try it their way with a 16 - 17" round).  Regardless of what shape you choose (and it may not actually be a choice - sometimes you just get what you get), roll the whole flat around the rolling pin, then unroll it over a large, unrimmed baking pan that you've lined with parchment paper.  I know that those of you who have been following me for awhile will remember that my most reliable oven for baking does not allow room for anything large, so I just used the bottom of a 9" springform pan and proved another fine example of 'work with what you've got'.


sugar floured dough on parchment


Next, combine 2 tablespoons of flour with 1 teaspoon of sugar and sprinkle it over the dough. Arrange the sliced apples on top in an overlapping fashion.  Leave 3-ish inches of border that you will fold over them when you are done.  This will all rely on using your own judgement based on your pan choice and dough shape - but I promise, you can do it.  Rustic.


apples assembled


orderly fashion


Once your apples are all tucked in with dough edges all around, brush them (the apples) with 2 tablespoons of melted butter, then sprinkle with 1 1/2 tablespoons of sugar.  I also gave mine a few uncalled for shakes of cinnamon (I know, I'm such a rebel).  After patting yourself on the back with your floury hands, put the whole thing in the fridge to chill while you wait for your oven to heat to 400 F / 205 C. Pop that beauty in the oven and set your timer for an hour.


rustic apple tart


Since we've got an hour to kill, I'll tell you about the last time I baked rustic apple anything.  When I was about 12, we had an apple tree.  We also had a wood stove with an oven.  One day my best friend (The Other Hannah) and I decided it would be a lovely idea to bake homemade pie.  We picked all of the apples and lit a nice fire in the stove.  We didn't know anything about chilled butter or ice water back then, but we mixed and rolled and assembled and baked at whatever temperature the fire gave us. We were extremely proud of ourselves and the (big) trouble we found ourselves in for lighting the wood stove when nobody was home was well worth our efforts (sorry Mom and Dad).  It was truly the best. pie. ever.  That's rustic!  Note:  If you are reading this and happen to be at the age of 'don't light  fires without parental supervision' please do not attempt to try this at home.

Check on your pie.  When your crust is golden and your apples are tender, remove it from the oven and brush the apples with 2 tablespoons of melted apricot preserves.  If you don't have any apricot preserves, try pineapple.  If you don't have any of that, skip it.  I believe it only serves the purpose to make it shiny and beautiful (but perhaps I am wrong.. it happens).  Do NOT brush it with 2 tablespoons of melted berry preserves, which is all I had.  It won't ruin the taste, but it will look like you had a serious knife accident and bled all over your pretty tart. Anyway, brush it or don't, then slide the parchment paper (and pie) on to a wire rack (or four wide mouthed tea cups if you lack one like me) to let the tart cool slightly before serving.


tea time


That's it.  We're done!  Aside from the red preserves mishap, my apple tart was a hit.  The pastry was flaky and the filling was tasty.  My apples were happy.  Rustic works.  And pie IS the answer (to everything).


flaky pastry


¹No dentists were actually surveyed with regards to the properties of gluten for the purpose of this article.

Want to see more Sad Apples?  Feast your eyes at flickr.  Want to bake this?  Cut my babble and grab the recipe for Rustic Apple Tart from Food & Wine.  Please don't forget to share... Post your own photos and stories at The Perfect Avocado on Facebook.


Thursday, May 5, 2011

A Fresh Start

I have fairly good list of reasons why I've been away, but I'd much rather talk about why I'm back.

Radishes.

fresh start

Spring finally brought the sun and, with that, Saša and I decided to take on the task of reviving the disappearing garden.  We (ok, he) went to work with leveling the tragically overgrown patch, turning the soil and placing perfect rows of bricks to create a masterpiece mosaic of beautiful beds for our future bounty of fresh.  As an 'experimental' year (a term that will soften the blow for anything less than successful), we planted everything we could get our hands on. From arugula to zucchini, if we found seeds we sowed them.  We watered.  We weeded.  We waited.

And then...


a beautiful bouquet

Now really, what could possibly be better than a bunch of long stemmed red roses from your lover?  Why, a bouquet of fresh ruby radishes of course!  After a few jumps for joy and a celebratory kiss, I immediately whisked them away for a cold water bath, gently rubbing away their soil suits to fully expose their tasty roots.

cold water bath

Radishes (and other root vegetables) gather nutrients through water in the soil and feed their leaves which gather sunlight for energy to create sugars to feed back to the roots so they can grow up and become big, tasty edibles.  Naturally, bigger leaves capture more sun so, to do the best job they can for the team, the roots continue to give as much moisture as they possibly can to their above ground counterparts. Wait. What? You already know all about photosynthesis? Settle down. This is more than a science lesson; its a kitchen tip (so keep paying attention). If you remove the greens from your root vegetables as soon as you pull them from the ground you will stop the growing process; the roots retain their liquids (and nutrients) and you won't be disappointed by sadly soft radishes (or carrots... or beets...).  That makes such good sense, right?  I know!  You're welcome. Thanks for staying with me.

buzz cuts

As I performed the mandatory buzz cuts on my little batch of rad, my thoughts drifted toward the salads of our summer to come. Suddenly I was struck by a thought that pulled me right back to the present.  If we can eat radishes, we must be able to eat radish greens.  Can I make a salad today?  I paused for a quick conference with Google (please excuse my intuitive ignorance, but I wouldn't be able to cope with reading '...radish roots are lovely edibles; but stay away from the leaves, which are lethally poisonous..." after the fact)  To make a long story longer, the answer is yes.  The greens are absolutely fine to eat.

radish greens
Radish greens were washed.  Radish roots were sliced.  Carrots were shredded.  Onions were diced.  Wanting to keep it simple, I added the salad dressing equivalent of 'the little black dress' - a decent drizzle of (local homemade) olive oil, a double splash of  balsamic, a (small) sprinkle of salt and a dash of fresh ground pepper.  Classic beauty.  Always fresh.  Delicious.

radish green salad

Two things.  First, if you are running outside to your radish patch right now to tear off a leaf and taste for yourself, you'll probably come back later to tell me that I need to realign my taste buds.  Yes, the greens are bitter (and perhaps a wee bit prickly).  Remember the little black dress - it changes everything.  Second, if you do decide to try the radish green thing, I can't vouch for those which are bought at the store, but seriously doubt they'd be anything close to fresh (if I were buying radishes I'd just grab some lettuce too). In all honesty, while radish greens work well for salad, the flavour is not at all so radically exciting. The real thrill comes from planting a few tiny seeds, relying on nothing but earth, sun and rain, and filling a whole salad bowl three weeks later.  Nothing tastes better than that.

the goods


Want to see more Radish Green Salad?  Feast your eyes at flickr
.